

Before the installation crew packs up and leaves, run a quick walkthrough. That single step, done while corrections are still easy, is the most important thing this post-installation window inspection guide will tell you.
Here is what to check before you sign off:
- Operation: open and close every window fully; it should move without sticking, binding, or grinding
- Locks: engage every lock and handle; they should click firmly into place with no play
- Seals and caulk: scan the interior and exterior perimeter for continuous, unbroken caulk lines with no gaps at corners
- Flashing: confirm flashing is visible on the exterior and lapped so water sheds away from the frame
- Weep holes: check that drainage slots on the sill are clear and unobstructed
- Documentation: collect manufacturer warranty cards, NFRC/Energy Star labels, and a copy of the signed invoice before anyone leaves
Pro Tip: Hold final payment on any window with a water-entry or security-related defect until the issue is corrected in writing. A verbal promise is not a fix.
Table of Contents
- What should you do during the on-site walkthrough?
- Room-by-room component checklist
- Easy DIY tests you can run right now
- How to document problems and build a punch list
- What are the red flags you should never sign off on?
- What does a good maintenance schedule look like?
- Which records should you keep for warranty and energy claims?
- Key takeaways
- Why catching issues early is the right call
- Proplas offers professional inspection support across Ontario
- Useful sources and further reading
What should you do during the on-site walkthrough?
Start by speaking directly to the lead installer. A simple, “Before we wrap up, I’d like to walk through each window with you,” sets the right tone and keeps the process collaborative. FGIA guidance confirms that a systematic walkthrough while the crew is still present is the most effective way to catch issues that are easy to correct on-site but become disputes later.

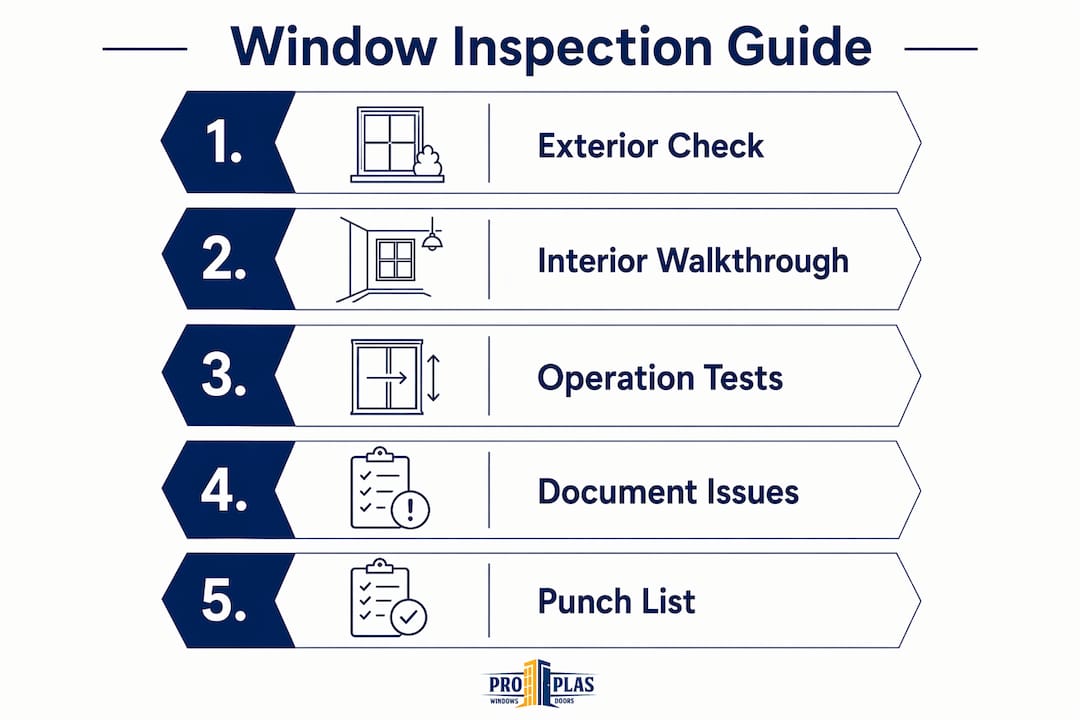
Walk in a consistent order: exterior perimeter first, then interior room by room, then operation tests, then documentation collection. At each window, look for even reveals (the gap between the frame and surrounding trim should be consistent on all four sides), continuous caulk with no holidays or thin spots, and flashing that overlaps correctly so water cannot travel behind the frame.
Capture a short video of any window that sticks, rattles, or fails to lock. Note the room and window position in your photo file names (e.g., “MasterBedroom_NorthWindow_exterior.jpg”). Collect all manufacturer labels before the crew removes them; building officials require factory stickers to remain in place for final inspection verification.
| Task | Estimated time |
|---|---|
| Single window (visual + operation) | 2–3 minutes |
| 5-window home | around a quarter of an hour |
| 10-window home | about half an hour |
| Documentation collection | 5–10 minutes |
Room-by-room component checklist
Work through each window systematically, checking these components in order. Post-installation inspection templates sequence checks from frame and anchorage through to finish so defects reveal themselves in the order they were installed.
Glass and insulated glass units (IGUs)
- No scratches, chips, or cracks on either pane surface
- No fogging, condensation, or moisture between panes (a failed IGU seal)
- Correct glass type installed (Low-E, tempered, obscure) per your contract
- Low-E coating on the correct surface (interior-facing on most Canadian climates)
Frame, sash, and hardware
- Frame is square and level; no visible bowing or warping
- Sash sits evenly in the frame with consistent gaps on all sides
- No dents, scratches, or colour mismatches from what was specified
- Hardware (cranks, lifts, tilt latches) operates without excessive force
Weatherstripping, caulk, and sealant
- Weatherstripping is fully seated and uncompressed around the entire sash perimeter
- Interior caulk lines are continuous, smooth, and free of gaps at corners
- Exterior caulk covers the joint between frame and surrounding finish material
- No foam over-expansion that could bow the frame inward
Flashing, sill, and drainage
- Flashing is visible on the exterior head and lapped correctly over the siding
- Sill is sloped outward so water drains away from the frame
- Weep holes (on casement and slider sills) are open and free of debris or caulk
Window-type specific checks
- Double-hung: both sashes tilt in for cleaning; balance system holds sash at any height
- Casement: crank operates smoothly through full range; no binding at the hinge side when closing
- Slider: panel glides without lifting off the track; meets egress width requirements where required
- Awning: stays open under its own weight; no drip edge gap when closed
- Fixed: frame is flush with surrounding trim; no visible daylight around the perimeter
Easy DIY tests you can run right now
Draft test
Hold a lit candle or incense stick near the frame perimeter with the window closed. A flickering flame indicates air infiltration at that point. Pay close attention to corners and the junction between the frame and the rough opening. Air leaks here affect both comfort and your home’s energy efficiency over time.
Lock and force test
Close and lock the window, then apply gentle outward pressure on the sash. There should be no movement or rattle. A sash that shifts under light pressure has either a hardware or weatherstripping problem.
Smooth operation test
Open and close every operable window three times in a row. Listen for scraping or grinding; those sounds usually point to alignment or debris issues that need correction before the crew leaves. A window that requires two hands to close is not properly adjusted.
IGU fogging check
Look through each pane in natural light at an angle. Any haze, cloudiness, or visible moisture between the two panes means the IGU seal has failed. This is a manufacturing or handling defect, not a maintenance item.
How to document problems and build a punch list
Clear documentation is what separates a resolved defect from a prolonged dispute. Note the exact location of every issue using room name, wall direction, and window position (e.g., “Living room, south wall, left casement, exterior lower-left corner”). Vague notes like “bedroom window” are hard to act on and easy to dispute.
A field inspection template structures corrective actions with ownership and due dates. Build your punch list with these columns:
- Item number for reference
- Location (room, wall, window position)
- Photo reference (file name)
- Description of the defect
- Severity (urgent/standard/cosmetic)
- Proposed fix
- Responsible party (installer or manufacturer)
- Agreed completion date
Urgent items (water entry, failed lock, broken glass) warrant a 48–72 hour turnaround. Standard installation defects (caulk gaps, trim alignment) are reasonable at 7–14 days. Cosmetic items (minor scratches, paint touch-ups) can run up to 30 days.
After the walkthrough, send a brief written summary to the installer: list each item by number, confirm the agreed dates, and state that final payment will be released upon satisfactory completion. Keep a copy. A final QA checklist with signature fields formalises this handover and protects both parties.
What are the red flags you should never sign off on?
Some defects are not punch-list items. These require you to withhold sign-off entirely until they are corrected:
- Damaged glass: any crack, chip, or broken IGU seal must be replaced, not patched
- Wrong product installed: if the window does not match the model, size, or glass type on your contract, do not accept it
- Continuous water entry: active moisture intrusion during or after installation is an immediate stop-work item
- Incorrect flashing integration: flashing lapped the wrong direction or missing entirely can cause concealed water damage within months
- Sagging or bowed frames: a frame that is not square will never seal correctly and will worsen over time
- Missing or removed manufacturer labels: labels must remain in place for code and warranty verification; their absence is a red flag
If the installer is unresponsive after a written request, escalate in this order: contact the manufacturer’s warranty department directly with your documentation, file a complaint with your provincial consumer protection office, and consult a licensed home inspector for an independent assessment. Knowing the signs of poor window installation before you escalate strengthens your position considerably.
Understanding why installation warranty matters is also worth reviewing before you reach that point. Actions that can void coverage include applying third-party caulk over manufacturer-specified sealant zones, painting over weatherstripping, or modifying hardware without authorisation.
What does a good maintenance schedule look like?
The initial walkthrough is the start of an ongoing routine, not a one-time event.
- Before the crew leaves: full walkthrough per this guide
- Annual visual check (ideally September, before winter): inspect caulk for cracking, check weep holes for debris, test all locks and hardware
- Every 3–5 years (or when performance drops): full functional inspection including draft test, IGU fogging check, and weatherstripping condition
Industry recommendations advise an annual visual inspection and a more thorough functional check every few years to preserve long-term performance.
| Interval | Task |
|---|---|
| Day of installation | Full walkthrough, punch list, documentation |
| 30 days post-install | Confirm punch-list items completed; re-test repaired windows |
| Annual (September) | Visual caulk check, weep hole cleaning, hardware test |
| Every 3–5 years | Full draft test, IGU check, weatherstripping replacement if compressed |
| As needed | Re-caulk small gaps, lubricate hardware per manufacturer instructions |
Weatherstripping typically needs replacement every 5–10 years depending on climate and use. Caulk around exterior frames generally lasts 5–7 years in Canadian conditions before it begins to crack or separate.
Which records should you keep for warranty and energy claims?
Save these documents in a dedicated folder, physical or digital, from day one:
- Signed invoice and installation contract with itemised scope of work
- Manufacturer warranty documents (product and glass unit, separately)
- NFRC and Energy Star labels (photograph them before the installer removes them; note the serial number)
- Product spec sheets including model numbers and performance ratings
- Permit and inspection records if a permit was required for your replacement
- Punch list and written correspondence with the installer
Energy Star Canada and your provincial utility’s rebate programme may require the NFRC label or a product specification sheet as proof of eligibility. Photograph labels the day of installation; once they are removed, recovering that data requires contacting the manufacturer directly, which adds delay. For energy-efficient windows in Ontario, keeping the original spec sheet is often the fastest path to a rebate application.
For digital organisation, name files consistently: “2026-03-15_LivingRoom_NorthWindow_NFRClabel.jpg” is searchable and unambiguous. Store copies in cloud backup (Google Drive, iCloud, or OneDrive) and share the folder link with your installer when submitting warranty claims.
Key takeaways
A thorough post-installation inspection, done before the crew leaves, is the single most effective way to protect your warranty rights and prevent costly water or energy problems down the road.
| Point | Details |
|---|---|
| Inspect before sign-off | Run a full walkthrough while installers are present so corrections happen on-site. |
| Document everything | Photograph each window with timestamps and build a written punch list with agreed dates. |
| Know your red flags | Damaged glass, wrong product, active water entry, and missing flashing require withholding sign-off. |
| Keep all records | Save your invoice, warranty cards, NFRC labels, and permit documents in a single organised folder. |
| Proplas backs its work | Proplas provides Energy Star-certified installations and documented handover support, backed by extensive experience and a strong warranty. |
Why catching issues early is the right call
The most common miss Proplas sees after 25 years and over 10,000 installations is not a dramatic defect. It is a small flashing gap or an over-foamed jamb that nobody noticed on installation day. Left uncorrected, that gap allows water to track behind the cladding for months before it shows up as interior staining or mould. By then, the repair cost is far higher than a five-minute fix would have been.
The post-installation inspection is not about distrust; it is about protecting an investment you have already made. Every homeowner has the right to a documented punch list, a clear timeline for corrections, and a final sign-off that reflects work actually completed. Proplas builds that process into every job because transparent handovers protect both the homeowner and the installer.
Proplas offers professional inspection support across Ontario
Proplas brings 25 years of installation experience and Energy Star-certified products to homeowners across Ontario who want confidence that their windows were installed correctly.

If your post-install walkthrough raised questions, or if a previous installer is unresponsive to your punch list, Proplas can help. A professional on-site audit covers operation, seals, flashing, drainage, and documentation, and you receive a prioritised written report with a repair estimate. No hidden fees, no pressure, just a clear picture of where things stand.
Check the window replacement cost guide for Ontario to understand what remedial work or a full replacement might involve, or review replacement windows that actually pay off if your inspection reveals that repair is no longer the most cost-effective path. Contact Proplas to book your inspection and get a transparent, written assessment.
Useful sources and further reading
- Inspecting Your New Windows: What to Check Before Signing Off | GlassAdvisor — FGIA and AAMA-referenced walkthrough guide; useful for operation testing and documentation standards.
- Window Inspection Checklist: Essential Standards to Verify After Installation | HIMOLON — Industry checklist covering maintenance cadence and annual inspection recommendations.
- Final QA Inspection Checklist for Windows and Doors | SafetyCulture — Practical template with signature fields for formal handover; independent of any manufacturer.
- Post-Installation Window and Door Quality Field Inspection Template | MangoApps — Structured punch-list template with ownership and due-date fields.
- Post-Installation Inspection Checklist for Quality | SafetyCulture — Sequences checks from frame and anchorage through to finish; useful for the ordered walkthrough.
- Window and Frame Replacement: Code Compliance Brief | Building America Solution Center — U.S.-based IECC/IRC reference; useful for understanding flashing, labelling, and permit requirements as a benchmark.
- Residential Window and Door Inspection Checklist | City of Ventura — U.S. municipal checklist; illustrates the factory-sticker and glazing verification requirements common to North American inspections.
- Energy Efficient Windows Guide for Ontario Homes | Proplas — Proplas resource on Energy Star labels, NFRC ratings, and Ontario rebate eligibility.
- Why Installation Warranty Matters for Window Replacements | Proplas — Explains warranty scope, documentation requirements, and what voids coverage.
This article is general information for Canadian homeowners and does not constitute legal or professional advice. Confirm current permit requirements, warranty terms, and rebate eligibility with your municipality, manufacturer, and a qualified contractor for your specific situation.