
ClickCease

A window jamb is defined as the vertical side members and top horizontal member that form the inner frame of a window opening, supporting the sash and sealing the gap between the window unit and the rough wall framing. Most homeowners walk past their window jambs every day without knowing what they are. Yet these structural components directly affect how well your windows open, close, and keep out cold air and moisture. Understanding the window jamb definition is the first step to making smarter decisions about window repair, replacement, or a full renovation project.

What is a window jamb and how does it work?

A window jamb is one of three frame members that surround a window opening: two side jambs (vertical) and one head jamb (horizontal, at the top). Side jambs guide the window sash as it moves up, down, or sideways, while the head jamb at the top carries weight and blocks water from entering the wall cavity. Together with the sill at the bottom and the casing trim on the interior and exterior, jambs form the complete structural and aesthetic frame of a window opening.

The jamb sits between the rough framing of your wall and the window unit itself. Its job is to create a precise, square, and level channel so the sash operates without binding or rattling. Without a properly fitted jamb, even a high-quality window will leak air, stick when opening, or allow moisture to seep into the wall.

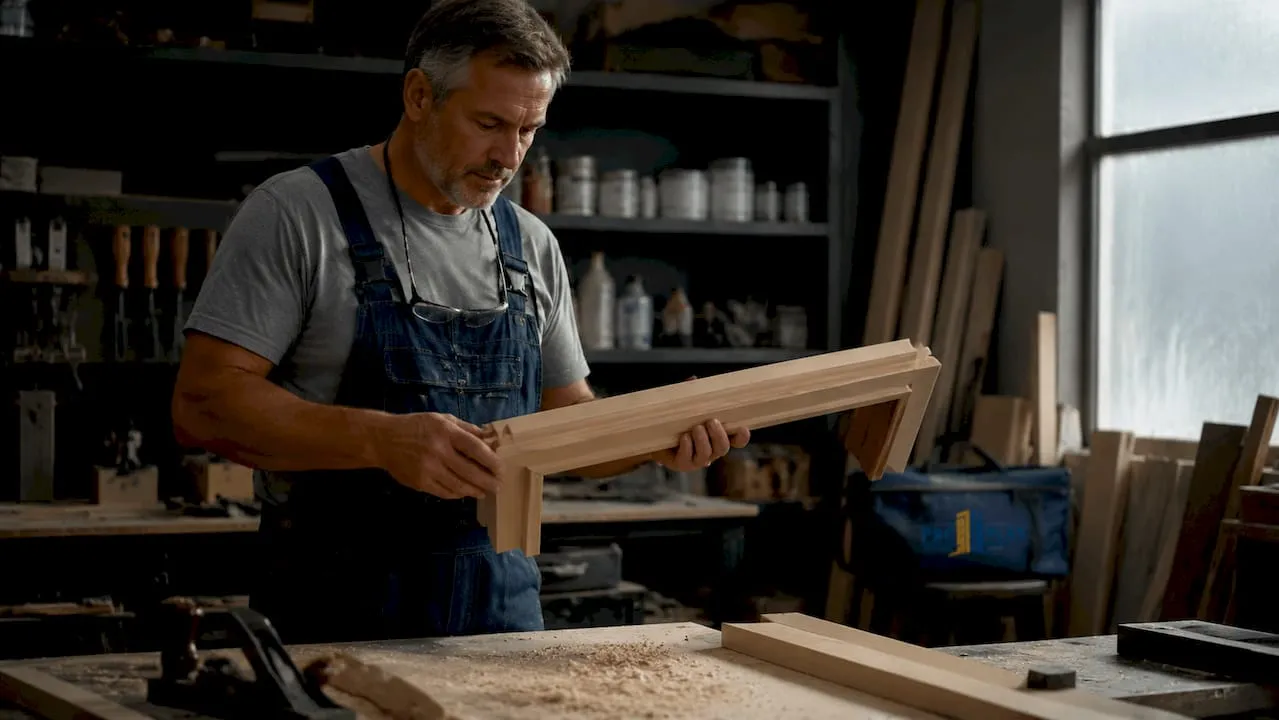
Installer fitting window jamb in wall opening

Jambs also carry the hardware that makes windows function. Weatherstripping channels, tilt latches on double-hung windows, and balance systems for single-hung units all attach directly to the jamb. This means the jamb is not just a passive frame. It is an active part of how your window performs every single day.

What are the main types of window jambs and materials?

Wood, vinyl, aluminum, and fiberglass are the four most common jamb materials, each with a distinct performance profile. Older Canadian homes built before the 1980s almost always have wood jambs. Newer construction leans toward vinyl or aluminum for better energy performance and lower maintenance.

Here is how each material compares:

  • Wood jambs offer excellent insulation and are easy to cut, shape, and paint. The downside is susceptibility to rot and moisture damage, especially in climates with freeze-thaw cycles like most of Canada.
  • Vinyl jambs resist moisture and require almost no maintenance. They provide good thermal insulation and are the most common choice in modern replacement windows.
  • Aluminum jambs are strong and slim, which maximises glass area. However, aluminum conducts heat and cold readily, making it a poor insulator without a thermal break built into the profile.
  • Fiberglass jambs offer the best combination of strength, insulation, and dimensional stability. They do not warp or expand with temperature changes, making them well suited to Canadian winters.

Beyond material, jambs also vary by position and function. Side jambs are the vertical members that run the full height of the window opening. The head jamb sits horizontally across the top. A sill, while technically a separate component, works in tandem with the jambs to complete the frame.

Jamb extensions are a related but distinct element. When a wall is thicker than the window unit’s standard jamb depth, an extension piece is added to bridge the gap and create a flush interior finish. This is common in homes with thick exterior walls or added insulation. Jamb extensions are typically made from the same material as the window’s main jamb and are either factory-supplied or custom-cut on site.

Infographic comparing window jamb types by material and function

How does a window jamb affect energy efficiency?

Jambs are the primary barrier against drafts and moisture, yet homeowners consistently underestimate their importance compared to the glass itself. Properly installed jambs include weatherstripping channels and flashing features that prevent air and water from entering the wall assembly. When these elements fail, the consequences show up directly on your energy bill and in your wall structure.

A damaged or poorly fitted jamb can allow cold air to bypass even the most energy-efficient glazing unit. The jamb is the seal between your window and your wall. If it fails, the window fails with it, regardless of its glass rating or Energy Star certification.

A warped wood jamb, for example, creates a gap along the weatherstripping channel. Cold air enters the room, the heating system works harder, and energy costs rise. In Canadian climates, this effect is most pronounced between november and march, when outdoor temperatures regularly drop below freezing. You can read more about how window sealing affects home emissions and energy use.

Moisture is the other major risk. A head jamb that is not properly flashed allows water to track down into the wall cavity during rain or snowmelt. Over time, this leads to mould, rot, and structural damage that costs far more to repair than a timely jamb replacement would have. Conducting a regular window and door energy audit helps catch these issues before they become expensive.

How to install a window jamb correctly

Accurate measurement is the foundation of a successful jamb installation. Professional installers take 12 measurements across a single window opening, three per side, to account for uneven drywall thickness and out-of-square framing. Using only one measurement per side is the most common DIY mistake, and it leads to jamb extensions that are either too wide or too narrow to sit flush.

Follow these steps for a proper jamb extension installation:

  1. Measure three points per side. Measure the depth from the window frame to the finished wall surface at the top, middle, and bottom of each side jamb, and at three points across the head jamb. Use the largest measurement as your target width so the extension covers the full gap.
  2. Rip extension stock to width. Use a table saw to cut your jamb extension material to the exact width needed for each side. Variations as small as 1/16 inch require custom ripping to achieve a flush fit.
  3. Set shim pairs at each fastener location. Place opposing shim pairs behind the extension to create a flat, stable backing. This prevents the extension from bowing inward when you drive fasteners.
  4. Fasten with 15-gauge finish nails. Drive nails through the extension and shims into the rough framing. Check plumb and level after every few nails to catch any shift before it sets.
  5. Repeat for the head jamb. Install the top extension last, fitting it between the two side extensions for a clean, tight corner.

Pro Tip: Re-check plumb and level after each few fasteners. Nailing can pull a jamb extension slightly out of position, and catching it early saves you from having to remove and reinstall the piece.

The table below summarises the key tools and their purpose in jamb installation:

Tool Purpose
Table saw Ripping extension stock to precise custom widths
15-gauge finish nailer Fastening extensions without splitting the material
Level and plumb bob Verifying the extension is straight and true
Tape measure Taking three-point measurements per side
Shims Creating a flat, stable backing behind extensions

For full-frame window replacement, measure diagonally across the opening at both corners. A difference greater than 1/4 inch means the opening needs shimming or structural adjustment before the new window goes in. Always size the window to the smallest of your three width and height measurements.

When should you repair or replace a window jamb?

Jamb damage is easier to spot than most homeowners expect. The key is knowing what to look for before you commit to a window replacement project.

Signs that your jamb needs attention:

  • Soft or spongy wood when you press a screwdriver or awl into the jamb surface. Soft spots indicate rot has started below the paint layer.
  • Visible gaps between the jamb and the wall or between the jamb and the window sash. These gaps allow air and water to enter.
  • Paint bubbling or peeling along the jamb edges, which signals moisture is trapped inside the wood.
  • Difficulty operating the window. A warped jamb binds the sash and makes opening or closing the window feel stiff or uneven.
  • Visible mould on or near the jamb, particularly at the corners where the head jamb meets the side jambs.

Insert window replacements rely on existing jambs being in sound condition. If the jamb is rotted or structurally compromised, an insert replacement will not work. You need a full-frame replacement instead, which removes the entire window unit, jambs included, and starts fresh. This distinction matters because full-frame replacements cost more and take longer, but they are the only correct solution when the jamb is damaged.

For minor rot, epoxy wood filler repairs can restore the jamb’s structural integrity before a new window goes in. The process involves removing all soft wood, applying the filler in layers, and sanding it flush once cured. This approach works well for surface rot that has not penetrated deep into the jamb. Ignoring rot, even minor rot, allows moisture to continue spreading into the wall framing, turning a small repair into a major structural project.

Pro Tip: Before booking any window replacement, probe every jamb with a screwdriver. Five minutes of inspection can tell you whether you need an insert replacement or a full-frame job, and that distinction can significantly change your project budget.

What we have learned from 25 years of jamb installations

After working with over 10,000 homeowners across Canada, the single most consistent mistake we see is skipping the jamb inspection before ordering a replacement window. A homeowner orders an insert window, the installer arrives, and the jamb turns out to be rotted. The project scope doubles on the spot.

The second most common issue is measurement error. Homeowners measure once per side and assume the opening is square. Real walls are rarely square. Drywall thickness varies. Framing shifts over decades. Taking three measurements per side is not excessive caution. It is the minimum standard for a professional result.

We also see homeowners focus almost entirely on glass ratings and Energy Star certification when choosing replacement windows, which are genuinely important factors. But a high-performance window installed into a damaged or poorly fitted jamb will underperform from day one. The jamb is the connection between the window and the house. Get that connection right, and the window performs as designed. Get it wrong, and no amount of glazing technology compensates for the air and moisture that bypass the frame.

When the work is beyond a straightforward DIY repair, calling a professional is the right call. Jamb replacement in older homes with non-standard wall thicknesses or irregular framing requires experience and the right tools. The cost of professional installation is far lower than the cost of repairing water damage caused by a jamb that was not fitted correctly.

— Proplas

Proplas replacement windows: built for proper jamb performance

Choosing the right replacement window starts well before the window arrives at your door. Proplas has spent 25 years helping Canadian homeowners get this process right, from jamb inspection through to final installation.

https://proplas.ca

Proplas offers Energy Star certified replacement windows designed to work with properly prepared jambs and wall openings. Every installation comes with a lifetime warranty, and Proplas completes most projects in as little as three days with no hidden fees. Before your project begins, the window replacement preparation checklist walks you through every step, including jamb inspection, measurement, and what to expect on installation day. Contact Proplas to get a quote and find out which replacement option fits your home.

FAQ

What is a window jamb in simple terms?

A window jamb is the vertical side frame and top horizontal frame that surround a window opening, supporting the sash and sealing the gap between the window and the wall.

What is the difference between a window jamb vs casing?

The jamb is the structural inner frame that holds the window sash in place. The casing is the decorative trim applied over the jamb on the interior and exterior to cover the gap between the jamb and the finished wall surface.

What are the types of window jambs by material?

The four main types are wood, vinyl, aluminum, and fiberglass. Wood is common in older homes, while vinyl and fiberglass are preferred in modern construction for their insulation and low maintenance.

How do I know if my window jamb needs replacing?

Press a screwdriver into the jamb surface. Soft or spongy wood indicates rot. Visible gaps, paint peeling, and difficulty operating the window are also clear signs the jamb needs repair or replacement.

Can I install a window jamb extension myself?

Yes, but accurate measurement is critical. Take three measurements per side to account for uneven drywall, use a table saw to rip extension stock to exact widths, and check plumb and level after every few fasteners to avoid a crooked finish.