

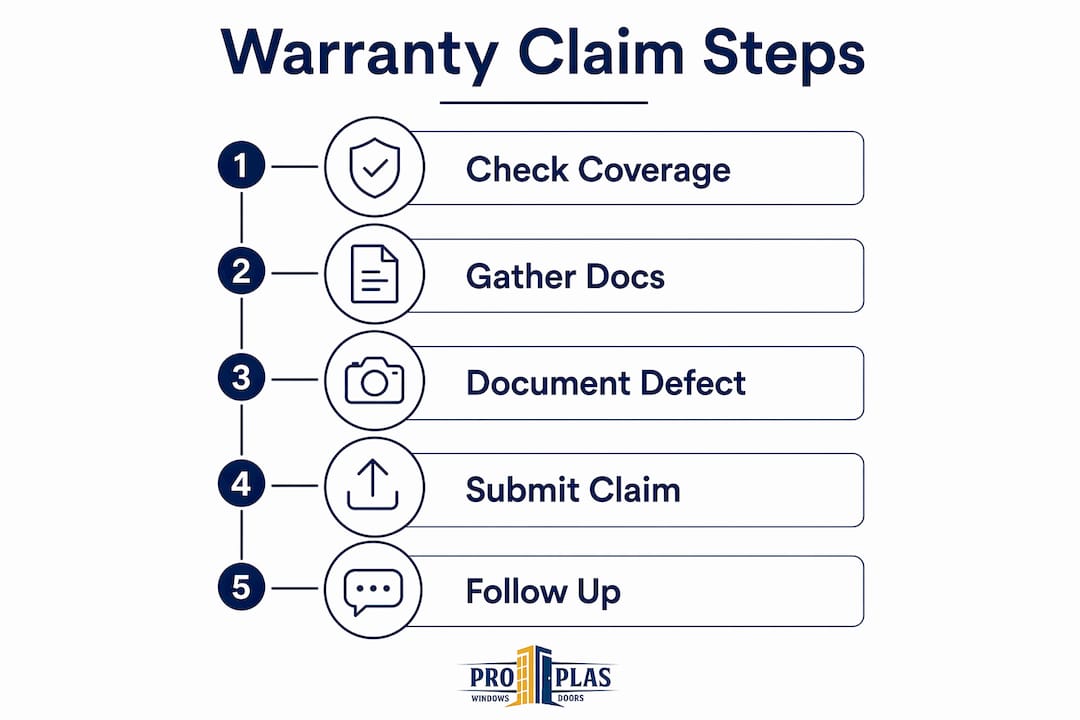
Filing a window warranty claim follows a clear sequence: review your coverage terms, gather your documentation, record the defect thoroughly, submit the claim through the manufacturer’s or installer’s official channel, and follow up until you receive a written decision. Most claims that succeed do so because the homeowner prepared before picking up the phone. Most that fail do so because of missing paperwork or a misunderstanding of which warranty applies. Understanding the difference between a manufacturer warranty and an installer warranty is the single most important step before you do anything else.
Here is what the process looks like from start to finish:
- Review your warranty documents to confirm coverage type, duration, and any exclusions before contacting anyone.
- Gather all required documentation: proof of purchase, warranty certificate, serial numbers, and photos of the defect.
- Document the problem with dated photographs from multiple angles, including the window’s identification label.
- Submit your claim through the manufacturer’s or installer’s official channel, whether that is an online portal, email, or phone.
- Follow up in writing and keep a log of every interaction, including names, dates, and reference numbers.
Pro Tip: Start a dedicated folder, physical or digital, the day your windows are installed. Drop every receipt, warranty document, and installation photo in there. If a problem surfaces two years later, you will have everything in one place.
Table of Contents
- How to review your window warranty coverage and understand your terms
- What documentation do you need to file a window warranty claim?
- How to properly document and verify the window problem before filing a claim
- How to submit your claim and manage follow-up communication effectively
- What conditions void your window warranty, and how do you avoid them?
- What timelines should you expect during a window warranty claim in Canada?
- Expert tips to increase your chance of a successful window warranty claim
- Proplas backs your windows with a warranty built for Canadian homeowners
- Key takeaways
How to review your window warranty coverage and understand your terms
Window warranty coverage in Canada typically comes from two separate sources, and confusing them is the most common reason homeowners contact the wrong party.
Manufacturer and installer warranties cover fundamentally different things. The manufacturer’s warranty addresses defects in materials and workmanship at the factory level: glass seal failure, hardware malfunctions, and finish degradation. The installer’s warranty covers what happens on your property during and after installation: flashing, water infiltration, and gaps around the frame. If your window is fogging between the panes, that is a manufacturer issue. If water is leaking around the frame, that is an installation issue.
Common coverage areas to check in your warranty documents:
- Insulated glass unit (IGU) seal: typically covered for 10–20 years against seal failure and fogging.
- Hardware (locks, hinges, handles): often covered for 5–10 years under the manufacturer warranty.
- Finish and colour: exterior finishes are usually covered for 5–10 years against peeling or fading under normal conditions.
- Labour for repairs: may be covered for a shorter period than the product itself, sometimes only 1–2 years.
- Transferability: many manufacturer warranties apply only to the original homeowner and are not transferable to a buyer.
Warranty durations vary considerably depending on the product tier and manufacturer. The table below shows typical coverage periods for common window components in Canada:
| Warranty Element | Typical Coverage Duration | Coverage Type |
|---|---|---|
| IGU seal (glass fogging) | 10–20 years | Full replacement, manufacturer |
| Hardware (locks, hinges) | 5–10 years | Full or prorated, manufacturer |
| Exterior finish | 5–10 years | Full, manufacturer |
| Installation workmanship | 1–5 years | Full, installer |
| Labour for warranty repairs | 1–2 years | Full, manufacturer or installer |
Key terms to verify before filing any claim:
- Coverage limits and dollar caps per claim.
- Specific exclusions (acts of nature, condensation on exterior surfaces, normal wear).
- Whether coverage is prorated after a certain number of years.
- Notification deadlines: some warranties require you to report defects within 30 days of discovery.
- Transferability conditions if you have purchased a home from a previous owner.
What documentation do you need to file a window warranty claim?
Missing or incomplete documentation is one of the most common reasons claims are denied outright. Collecting everything before you contact the manufacturer or installer saves time and prevents back-and-forth delays.
The manufacturer’s identification label on the window contains the serial number, order number, and manufacture date. These details are required to process any claim. The label is often located on the inside edge of the frame or sash, and on some window styles it may require removing a glazing bead or opening the sash fully to find it. Photograph it clearly before you need it.
Documentation checklist for your warranty claim:
- Proof of purchase: original receipt or invoice showing the purchase date, product description, and seller’s name.
- Warranty certificate: the physical or digital warranty document provided at the time of purchase or installation.
- Serial number and order number: found on the manufacturer’s identification label on the window itself.
- Manufacture date: also on the label, used to confirm the product is within the warranty period.
- Photos of the defect: clear, well-lit images from multiple angles showing the problem.
- Photo of the identification label: taken at the same time as the defect photos to link the claim to the specific unit.
- Installation records: any paperwork from the installer confirming the installation date and scope of work.
- Previous correspondence: any emails, letters, or notes from prior contact with the manufacturer or installer about this issue.
Pro Tip: If you cannot locate the identification label, contact the installer first. They often retain a copy of the order details and can provide the serial number directly, saving you from having to disassemble part of the window frame.
How to properly document and verify the window problem before filing a claim
Strong documentation of the defect itself is what separates a claim that moves quickly from one that stalls. Manufacturers and installers need enough detail to assess the problem remotely before deciding whether to send a technician or request the product for evaluation.

Photograph the defect from at least three angles: a wide shot showing the full window, a mid-range shot showing the affected area in context, and a close-up of the defect itself. Include a photo of the identification label in the same session so the images are date-stamped together. If the problem is fogging between panes, photograph it at different times of day since temperature changes can make it more or less visible.
Steps to document and verify the defect:
- Write a clear, factual description of the problem: what you see, when you first noticed it, and whether it has changed over time.
- Note the date of discovery and any conditions that may be relevant (recent weather, temperature extremes).
- Distinguish between a product defect and an installation issue. Signs of poor window installation include gaps around the frame, drafts, and water infiltration near the sill, while product defects typically involve the glass unit, hardware, or finish.
- If the cause is unclear, consider hiring a third-party inspector or a qualified window technician to provide a written assessment. This is particularly useful if the manufacturer and installer are each pointing to the other party.
- Document any troubleshooting steps you have already taken, such as cleaning the frame or adjusting the hardware, so the manufacturer knows the problem persists despite basic maintenance.
Clear, specific defect documentation reduces the chance of disputes and gives the warranty team what they need to make a decision without an on-site visit.
How to submit your claim and manage follow-up communication effectively
Once your documentation is complete, the submission process itself is straightforward. The key is to use the official channel the manufacturer or installer specifies and to keep a written record of every step.

Most manufacturers offer an online portal for warranty submissions, which is the fastest method and automatically generates a confirmation number. Email is the next best option because it creates a written record by default. Phone submissions are acceptable but always follow up with an email summarizing what was discussed, including the representative’s name and the date of the call.
Step-by-step submission process:
- Locate the warranty claim contact information in your warranty document or on the manufacturer’s website.
- Complete all required fields in the claim form, including serial number, defect description, and contact details.
- Upload or attach all documentation: photos, proof of purchase, and warranty certificate.
- Submit the claim and save or print the confirmation number immediately.
- Send a follow-up email within 24 hours if you submitted by phone, summarizing the claim details.
Warranty processing may involve remote troubleshooting, authorized inspections, shipping the product for evaluation, or an on-site technician visit, depending on the claim type. Knowing this in advance helps you respond quickly when the manufacturer requests the next step.
Follow-up best practices:
- Wait the timeframe stated in the warranty (often 5–10 business days) before following up.
- Reference your claim number in every communication.
- Keep every email and note the date, time, and name of any representative you speak with.
- Follow up in writing after every phone call with a brief summary of what was agreed.
Pro Tip: Keep a simple log, even a note app on your phone, with the date, the name of the person you spoke with, and a one-line summary of the outcome of each interaction. This log becomes your evidence if the claim is disputed or escalated.
What conditions void your window warranty, and how do you avoid them?
Knowing what voids a warranty is just as important as knowing what it covers. Many homeowners unknowingly compromise their coverage through routine maintenance or well-intentioned repairs.
Window warranties are commonly voided by unauthorized modifications, improper cleaning, and installation by an uncertified contractor. Drilling into the frame to add a security lock, using abrasive or solvent-based cleaners on vinyl or painted surfaces, and applying aftermarket films or tints without manufacturer approval are all typical void triggers. The installation workmanship warranty is particularly sensitive: if the windows were not installed by a qualified professional, the installer’s warranty may be void from day one.
Common conditions that void window warranties in Canada:
- Installation by an uncertified or non-approved contractor.
- Unauthorized modifications to the frame, sash, or glass unit (drilling, cutting, adding hardware).
- Use of abrasive cleaners, solvents, or pressure washers on frames or glass.
- Failure to report defects within the notification period specified in the warranty.
- Damage caused by misuse, accidents, or acts of nature (hail, flooding) unless specifically covered.
- Applying window film, tint, or coatings not approved by the manufacturer.
- Neglecting required maintenance outlined in the care guide, such as lubricating hardware annually.
Proper window care is one of the simplest ways to protect your warranty. Mild soap and water for frames, a soft cloth for glass, and annual hardware lubrication with a silicone-based product are all that most manufacturers require. Risks from DIY installation or modification are also worth noting: DIY installation pitfalls can void coverage before a single winter has passed.
If you are unsure whether a planned repair or modification will affect your warranty, contact the manufacturer in writing and ask for written confirmation before proceeding.
What timelines should you expect during a window warranty claim in Canada?
Setting realistic expectations about timing prevents frustration and helps you know when to escalate. Timelines vary based on the type of claim, the manufacturer’s processes, and whether an inspection or product evaluation is required.
Many legitimate claims are approved within 7–14 days when complete documentation is submitted through the manufacturer’s official channel. Complex claims involving on-site inspections or product shipping take longer. Seasonal demand also plays a role: claims submitted in spring and early summer, when window replacements peak in Canada, may take longer to process than those submitted in autumn or winter.
| Claim Stage | Typical Timeframe |
|---|---|
| Initial acknowledgement of claim | 1–3 business days |
| Documentation review and assessment | 3–7 business days |
| Remote troubleshooting or inspection scheduling | 5–10 business days |
| Approval or denial decision | 7–14 business days after full documentation received |
| Repair or replacement scheduling | 2 weeks after approval |
Actions that speed up the process:
- Submit complete documentation on the first attempt, with no missing fields or attachments.
- Respond promptly to any requests for additional information or inspection access.
- Use the manufacturer’s online portal rather than phone or mail when available.
- Confirm your availability for an inspection or technician visit within the first response.
If you have not received an acknowledgement within three business days of submission, follow up in writing and attach your original submission. If the claim has been under review for longer than the timeframe stated in your warranty document with no update, escalate to a supervisor and reference the warranty’s stated processing commitment. Under Canadian consumer protection principles, manufacturers are expected to handle warranty claims in a reasonable and timely manner.
Expert tips to increase your chance of a successful window warranty claim
A few habits and decisions made early in the process can significantly improve your outcome. These are the details that experienced homeowners and industry professionals consistently point to.
Detailed record keeping is the single most reliable factor in claim success. This means saving receipts, photographing windows at installation, and logging every communication with the manufacturer or installer. A homeowner who can produce a timestamped photo of the defect, a copy of the original warranty, and a written log of three follow-up calls is in a far stronger position than one who relies on memory.
Practical tips for a stronger claim:
- File the claim as soon as you notice the defect. Delayed reporting is a common denial reason, and some warranties specify a 30-day notification window.
- Read the exclusions section of your warranty carefully before filing. Lifetime warranty labels often exclude labour, shipping, or specific components after a limited period. A warranty marketed as “lifetime” may cover only the glass unit for the full term while limiting labour coverage to two years.
- Document every troubleshooting step you take before filing, including cleaning, adjusting, or lubricating the affected component. This shows the manufacturer the problem is genuine and not a maintenance issue.
- Keep copies of all submitted documents. If the manufacturer’s system loses an attachment, you can resubmit immediately without delay.
- If your claim is denied, request the specific reason in writing. A written denial gives you the basis for an appeal or escalation.
What to do if your claim is denied:
- Request the denial reason in writing if you have not already received it.
- Review the denial against your warranty terms to confirm whether the exclusion cited actually applies to your situation.
- Submit a written appeal with any additional evidence that addresses the stated reason for denial.
- If the dispute is not resolved, contact your provincial consumer protection office. In Ontario, for example, the Ministry of Public and Business Service Delivery handles consumer complaints related to product warranties.
- For significant claims, consult a consumer rights lawyer or a licensed home inspector who can provide an independent assessment.
Pro Tip: Before escalating a denied claim, re-read the exact wording of the exclusion the manufacturer cited. Warranty language is often specific, and a denial based on “improper maintenance” may not apply if you followed the care instructions in the manual. A precise, written rebuttal citing the warranty’s own language carries more weight than a general complaint.
Proplas backs your windows with a warranty built for Canadian homeowners

When you invest in new windows, the warranty behind them matters as much as the product itself. Proplas has been installing windows and doors for Canadian homeowners for many years, and in that time the team has seen exactly where warranty claims succeed and where they fall apart. The difference almost always comes down to the quality of the original installation and the clarity of the warranty terms.
Proplas offers a lifetime warranty on its products, with no hidden fees and no fine print designed to catch you out. Every installation is carried out by certified professionals, which means your installer warranty is valid from day one. Products are Energy Star certified, built for Canadian climate conditions, and backed by transparent coverage terms that Proplas walks you through before the job begins.
If you are at the stage of choosing new windows and want to avoid the claim headaches this guide describes, the right starting point is a product and installer you can trust. Explore Proplas’s custom window options or get a quote directly from the team. No bureaucratic hurdles, no surprise costs, and installation often completed in as little as three days.
Key takeaways
A successful window warranty claim depends on knowing which warranty applies, having complete documentation ready before you file, and following up in writing at every stage.
| Point | Details |
|---|---|
| Two warranties, two parties | Manufacturer warranties cover product defects; installer warranties cover workmanship. Contact the right party first. |
| Documentation is decisive | Missing serial numbers, photos, or proof of purchase are the most common reasons claims are denied. |
| Approval timeline | Claims with complete documentation are typically approved within 7–14 days. |
| Void conditions to avoid | Unauthorized modifications, improper cleaning, and uncertified installation can void coverage entirely. |
| Proplas lifetime warranty | Proplas backs every installation with a lifetime warranty, certified installation, and transparent terms for Canadian homeowners. |