An energy audit for windows and doors is a systematic inspection that uses specialized tools to pinpoint exactly where your home is losing heat or cooling. Windows account for approximately 40% of envelope heat losses in a typical home. That single number explains why auditing your windows and doors first delivers the clearest picture of where your energy dollars are going. The formal term used by energy professionals is a home energy assessment, and it covers everything from blower door tests to infrared thermographic scans. This guide walks you through every step, from gathering tools to interpreting results and choosing between weatherstripping and full replacement.
What does an energy audit for windows and doors involve?
A professional home energy assessment combines a room-by-room inspection, past utility bills, a blower door test, and infrared imaging to locate air leaks around windows and doors. Each tool serves a specific purpose. The blower door depressurises the home to reveal pressure-driven leak pathways, while the infrared camera maps temperature differences that indicate where conditioned air escapes. Together, they produce an evidence-based picture that visual inspection alone cannot provide.
The assessment also reviews your home’s size, the number and size of windows, insulation levels, and usage patterns. These factors determine how significant each leak point actually is. A draughty sliding door in a poorly insulated wall contributes far more to your heating bill than a small gap around a well-insulated casement window. Understanding that context is what separates a useful audit from a simple walk-around.
What tools do you need before starting?
Preparation determines how accurate your audit results will be. Gather the following before you begin:
| Tool | Purpose |
|---|---|
| Blower door | Depressurises home to measure airtightness (ACH50) |
| Infrared camera | Detects temperature differences that reveal leak locations |
| Past utility bills (12 months) | Establishes baseline energy consumption |
| Measuring tape | Measures window and door perimeters for weatherstripping |
| Flashlight | Supports visual inspection of frames, seals, and thresholds |
| Smoke pencil or incense stick | Reveals air movement around frames without pressurisation |
Preparing your home correctly matters as much as having the right tools. Close all windows, doors, and fireplace dampers before testing. Clean the surfaces around frames so you can see cracks and gaps clearly. Remove curtains or blinds that could block infrared readings during the scan.
Pro Tip: Schedule your audit during cold weather, ideally between november and february in most Canadian provinces. The temperature contrast between indoors and outdoors makes infrared imaging far more accurate and reveals leaks that would be invisible in mild conditions.
Blower door equipment is typically rented from energy audit suppliers or accessed through a certified energy advisor. Natural Resources Canada’s EnerGuide programme connects homeowners with registered energy advisors who carry professional-grade equipment.
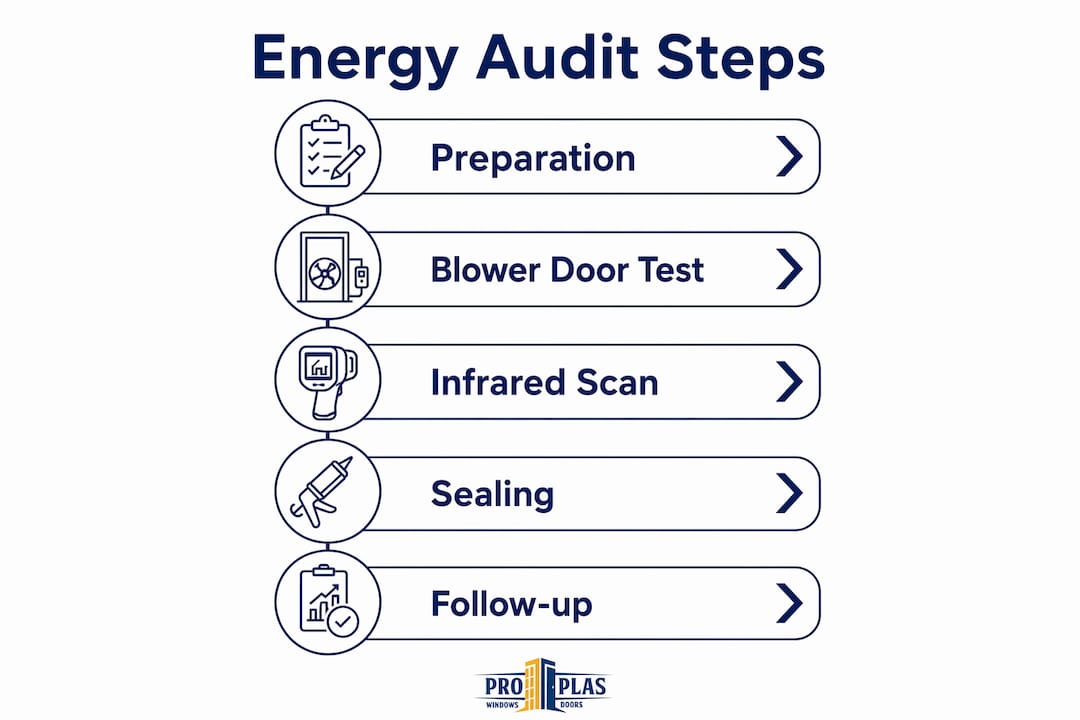
How to conduct the audit: step by step
Executing the audit in the right sequence prevents missed leaks and inaccurate readings. Follow these steps:
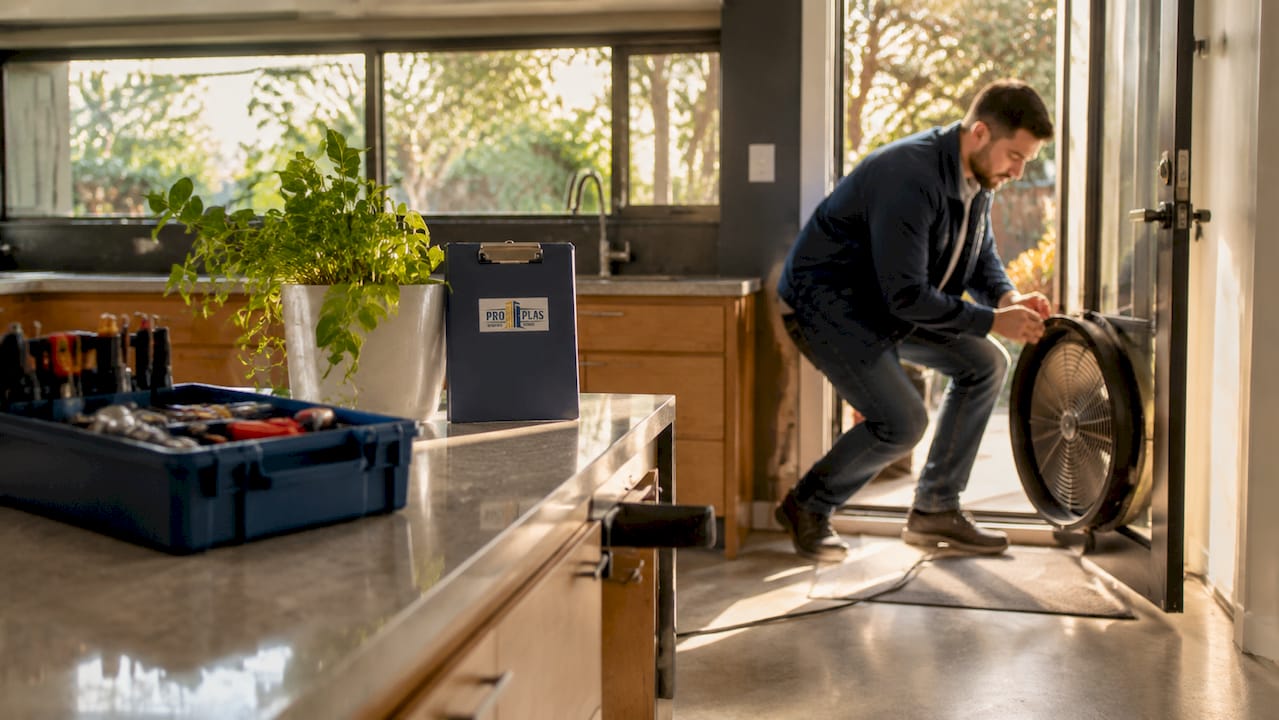
- Seal intentional openings. Close the fireplace damper, exhaust fans, and any vents you control. The blower door test requires the building envelope to be as closed as possible.
- Install the blower door. Mount the fan assembly in an exterior doorframe. The fan depressurises the home to a standard 50 Pascals of pressure difference.
- Record the ACH50 reading. ACH50 measures how many times per hour the entire air volume of the home is replaced at 50 Pascals. A lower number means a tighter home.
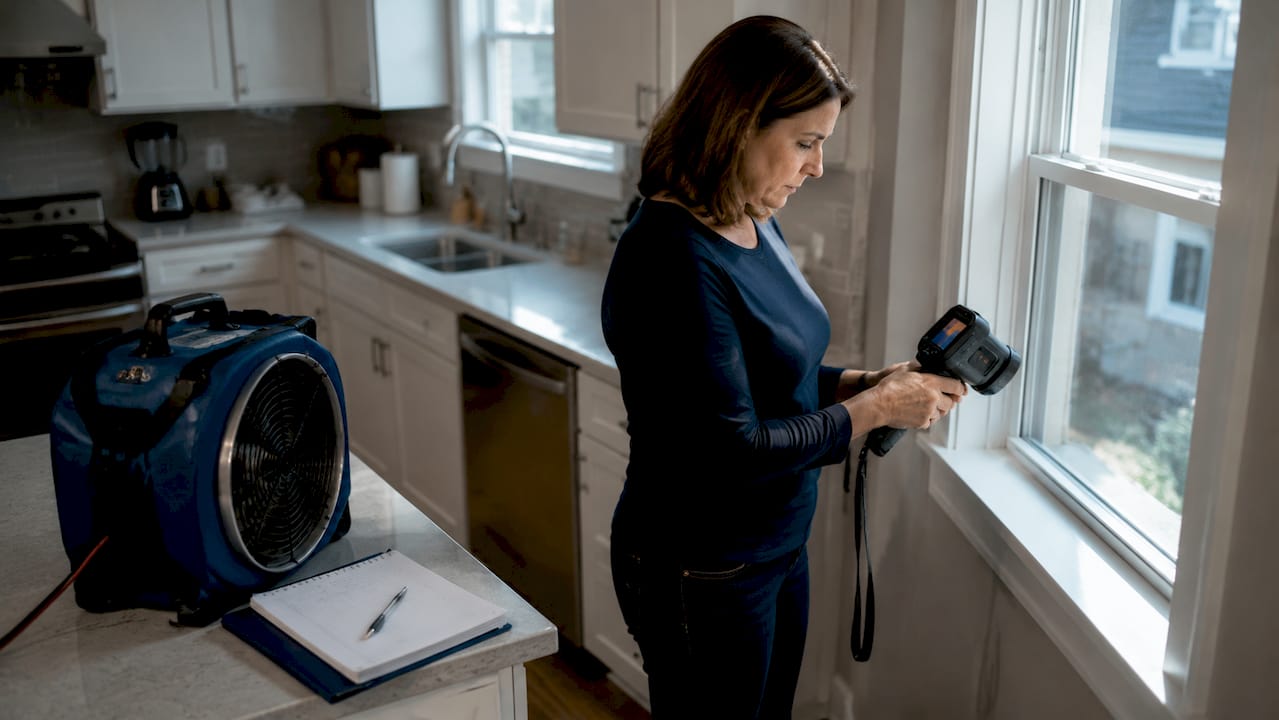
- Conduct the infrared scan. Walk each room with the infrared camera while the blower door runs. Blower door tests combined with infrared imaging activate leak pathways under pressure, making them visible as temperature anomalies on the camera screen.
- Mark and photograph every anomaly. Use painter’s tape or a marker to flag each leak location on the wall or frame. Photograph each one for your records.
- Perform a visual inspection. Check weatherstripping compression, frame gaps, caulking condition, and threshold seals on every window and door. Note any daylight visible around frames.
- Review utility bills. Compare your heating and cooling costs month by month against the leak locations found. This confirms which areas drive the highest losses.
Thermal imaging alone can mislead without the blower door running simultaneously. Temperature differences visible on camera can result from insulation variation rather than air leakage. The combined method removes that ambiguity.
Pro Tip: Pay extra attention to the corners of window frames and the bottom threshold of exterior doors. These two locations account for the majority of detectable air leaks in most Canadian homes.
A common pitfall is rushing the infrared scan. Move slowly, hold the camera steady for at least three seconds per frame, and scan from multiple angles. Leaks at the top of a window frame often only appear when you tilt the camera upward.
Weatherstripping vs. replacement: how to read your results
Once you have your audit findings, the next decision is whether to seal or replace. The answer depends on what your results actually show.
Window replacement yields a modest average 6.1% decrease in air infiltration. That figure surprises most homeowners who assume new windows solve all draughts. The reason is that air leakage often comes from the frame installation and surrounding wall assembly, not the window unit itself. Replacing the window without addressing those gaps produces limited improvement.
Use this comparison to guide your decision:
| Factor | Weatherstripping | Window or door replacement |
|---|---|---|
| Upfront cost | Low ($20–$80 per opening) | High ($400–$1,500+ per unit) |
| Effectiveness for frame gaps | High | Low without combined air sealing |
| Durability | 2–5 years depending on material | 20–30 years |
| Best for | Compression seal failures, worn thresholds | Cracked glazing, failed seals, single-pane glass |
| DIY suitability | Yes, with proper measurement | No, requires professional installation |
When replacement is the right call, product selection matters enormously. Fenestration energy efficiency depends on U-factor and solar heat gain coefficient (SHGC), and the right values differ by climate zone. A window rated for a mild Pacific coast climate performs poorly in a Manitoba winter. Look for NFRC-certified products that carry the ENERGY STAR label for your specific Canadian climate zone.
Selecting NFRC-certified windows matched to your region maximises both comfort and savings. Proplas carries Energy Star certified windows and doors designed for Canadian conditions, with products available across multiple window styles including casement windows and double hung windows that meet current energy performance standards.
For weatherstripping, measure the full perimeter of each opening and add 5–10% extra material to account for waste and cutting errors. Running short mid-project and leaving a gap unsealed defeats the entire purpose of the repair.
Common mistakes that reduce audit accuracy and long-term results
Avoiding these errors protects both your audit investment and your energy savings over time.
- Skipping the blower door and infrared combination. Visual inspection alone misses the majority of air leaks. Pressure-activated testing is the only reliable method for locating hidden gaps around frames and installation joints.
- Underestimating weatherstripping material. Adding 5–10% to your perimeter measurements prevents mid-project shortages that leave sections unsealed and reduce effectiveness.
- Ignoring frame and installation gaps. The gap between a window frame and the rough opening in the wall is one of the most common sources of air leakage. Caulking this joint is often more effective than replacing the window unit itself.
- Applying weatherstripping in cold temperatures. Most adhesive-backed weatherstripping requires surfaces above -7°C to bond correctly. Applying it in winter without warming the surface first leads to early failure.
- Treating all windows equally. North-facing windows lose more heat than south-facing ones in Canadian climates. Prioritise sealing and upgrading north and west exposures first for the fastest return.
Pro Tip: Seal the full perimeter of each window and door systematically, working from the top of the frame downward. This order prevents you from missing the corner joints, which are the most common failure points in long-term weatherstripping installations.
Long-term maintenance matters as much as the initial repair. Inspect weatherstripping every autumn before heating season. Check threshold seals on exterior doors for compression loss. Re-caulk any joints that show cracking or separation after the first winter freeze-thaw cycle.
Key takeaways
A home energy assessment for windows and doors requires blower door testing, infrared imaging, and targeted sealing to produce results that visual inspection alone cannot deliver.
| Point | Details |
|---|---|
| Windows drive major heat loss | Windows account for approximately 40% of envelope heat losses, making them the priority audit target. |
| Combined testing is non-negotiable | Blower door and infrared imaging together reveal leaks that neither tool finds independently. |
| Replacement has limits | Window replacement alone reduces air infiltration by an average of only 6.1%; frame sealing is equally critical. |
| Match products to climate zone | Select NFRC-certified, Energy Star windows with U-factor and SHGC values suited to your Canadian region. |
| Plan weatherstripping carefully | Measure full perimeters and add 5–10% extra material to avoid incomplete sealing mid-project. |
What 25 years of window and door installations taught us
After working with over 10,000 Canadian homeowners, one pattern stands out clearly: the homeowners who get the best results from an energy audit are the ones who treat it as a diagnostic process, not a shopping list. They use the blower door data to rank their leaks by severity before spending a single dollar on materials or products.
The finding that window replacement yields only a modest 6.1% average air infiltration reduction aligns with what we see on the ground. Homeowners who replace windows without addressing the surrounding installation gaps often call us back frustrated. The window is new, but the draught remains. The fix was never the glass. It was the joint between the frame and the wall.
We also see homeowners skip certified energy advisors to save money on the assessment itself, then spend far more on the wrong upgrades. Natural Resources Canada’s EnerGuide programme subsidises professional assessments in many provinces. The upfront cost of a proper assessment is almost always recovered in the first heating season when the right repairs are made.
Our honest recommendation: prioritise air sealing before replacement in most cases. If your windows are single-pane, have failed glazing seals, or are more than 25 years old, replacement makes sense. For everything else, a thorough sealing job combined with threshold adjustments delivers faster payback and less disruption.
— Proplas
Proplas Energy Star windows and doors for Canadian homes
After completing your audit, the next step is acting on what you found. Proplas offers Energy Star certified replacement windows and doors built specifically for Canadian climate conditions, with no hidden fees and installation often completed in as little as three days.

Whether your audit identified failing seals on a picture window or air leaks around an exterior door, Proplas has certified products to match. Explore Energy Star replacement windows to understand which ratings apply to your climate zone, or browse the full doors collection for energy-saving door options. Every product comes backed by a lifetime warranty, so your upgrade lasts well beyond the next audit cycle. Request a quote directly through the Proplas website to get a transparent, customised price for your home.
FAQ
What is an energy audit for windows and doors?
An energy audit for windows and doors is a professional home energy assessment that uses blower door tests and infrared imaging to locate air leaks and measure heat loss around window and door openings. The goal is to identify which openings need sealing, upgrading, or replacement.
How much energy do windows lose in a typical home?
Windows account for approximately 40% of envelope heat losses in a typical residential building. That makes them the single largest source of heat loss in the building envelope.
Does replacing windows fix air leaks?
Window replacement alone produces a modest average reduction in air infiltration. Research shows an average 6.1% decrease after replacement, because most leakage comes from the frame installation and surrounding wall assembly rather than the window unit itself.
What is the best time of year to audit windows and doors in Canada?
The best time is during cold weather, typically between november and march. The temperature difference between indoors and outdoors makes infrared imaging far more accurate and reveals leaks that mild conditions would hide.
How do I choose the right replacement window for my climate zone?
Select NFRC-certified windows that carry the Energy Star label for your specific Canadian climate zone. U-factor and SHGC ratings must match your region for the product to deliver its rated energy performance.