
Replace windows in this order: urgent first (safety failures, active water damage, blocked egress), then high-impact (large windows and north-facing rooms causing the most heat loss), then medium priority (older single-pane or failed sealed units in occupied rooms), and finally low priority (cosmetic issues or rarely used spaces). That sequence protects your family, stops active damage, and delivers the fastest return on your investment.
Here is the one-line rationale for each tier:
- Urgent (replace now): A window that cannot lock, blocks a fire-escape route, or has active water infiltrating the frame puts safety and structure at risk today.
- High impact (replace soon): Large or north-facing windows in living areas and bedrooms bleed heat continuously through a Canadian winter, driving up energy bills every month they stay.
- Medium priority (plan within 12–24 months): Single-pane glazing and failed sealed units (fogged or condensation between panes) offer little thermal resistance and will only worsen.
- Low priority (monitor and budget): Windows with minor cosmetic wear or in infrequently used rooms can wait without meaningful safety or energy consequences.
Pro Tip: Walk through your home on the coldest morning of the week. Hold your hand near each window frame. If you feel a noticeable draft within 15 centimetres of the glass or frame, that window belongs in your top tier regardless of its age.
Key takeaways
Replacing windows in the right order protects your home, maximises comfort gains per dollar, and avoids costly rework from poor sequencing or installation shortcuts.
| Point | Details |
|---|---|
| Safety and damage come first | Windows with failed locks, blocked egress, or active water infiltration must be replaced before any other window, regardless of budget. |
| Occupied rooms and large windows next | North-facing bedrooms and large living-area windows cause the most heat loss and discomfort; replacing them early delivers the fastest comfort return. |
| Frame condition drives the install method | Choose full-frame replacement when frames are rotted or out of square; insert replacement typically saves $200–$300 per window in labour when frames are sound. |
| Keep your NFRC and ENERGY STAR labels | Photograph labels during installation — they are required for utility rebates, warranty claims, and NRCan certification verification. |
| Proplas provides a written priority plan | Proplas assesses every window on-site and delivers a ranked, phased replacement scope with transparent pricing and a lifetime warranty. |
Table of Contents
- Which windows show signs they need replacing right now?
- Which rooms and window locations give you the biggest benefit first?
- How do window age, glazing, and frame condition change your replacement priority?
- Insert replacement or full-frame: which one should you choose?
- How does window replacement fit into a larger renovation schedule?
- What does window replacement cost, and when is the best time to do it?
- A simple decision framework you can use on your next walk-through
- How Proplas approaches window prioritisation for Toronto and Southern Ontario homeowners
- The practical judgement most homeowners miss
- Ready to get a clear priority list for your home?
- Sources
Which windows show signs they need replacing right now?
The windows that cannot wait share one of three problems: they are unsafe, they are letting water into your structure, or they have failed so completely that no amount of weatherstripping will fix them. Prioritisation frameworks consistently put safety and active damage ahead of comfort and energy efficiency, because the consequences of ignoring them compound quickly.
The urgent signs to act on immediately:
- Failed locks or hardware: A window that cannot latch is a security and fire-safety failure. In a bedroom, it may also violate egress requirements under the Ontario Building Code, which specifies minimum openable area for sleeping rooms.
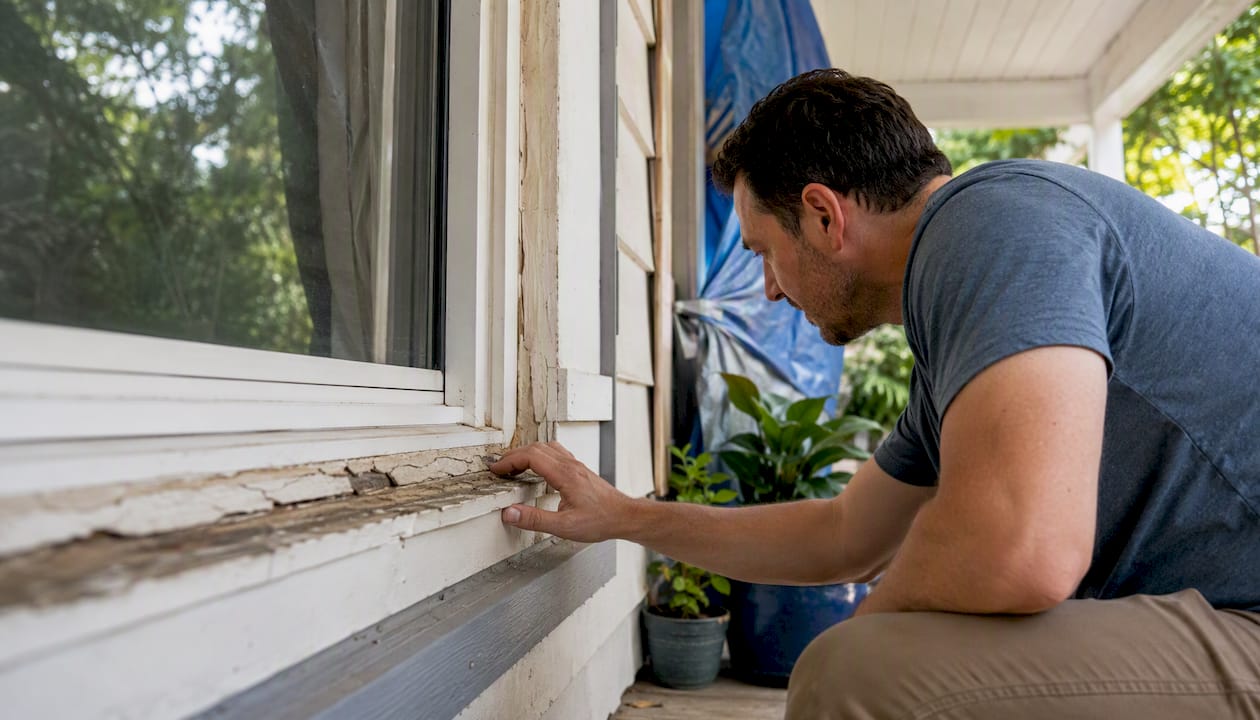
- Active water infiltration: Water staining on the sill, soft or discoloured drywall below the frame, or peeling paint on the interior trim are signs that water is already inside your wall assembly. Every rain event worsens the damage.
- Structural rot in the frame or rough opening: Press a screwdriver gently into a wood frame. If it sinks without resistance, the rot has likely spread to the rough opening. This is a full-frame replacement situation, not a patch job.
- Cracked or broken glass: Beyond the obvious safety risk, a broken pane eliminates all thermal and acoustic performance and accelerates moisture entry.
- Severe seal failure with visible fogging: When the inert gas fill between panes escapes, the sealed unit’s insulating value drops sharply. Condensation trapped between panes cannot be cleaned and will not resolve on its own.
- Blocked or inoperable egress: A basement bedroom or any sleeping room must have a window that opens wide enough to escape through. If it is painted shut, swollen, or mechanically broken, it is a code and life-safety issue.
Pro Tip: Before calling a contractor, photograph every problem window from inside and outside. Note the room, the orientation (north, south, east, west), and whether the issue is hardware, glass, frame, or water. That documentation speeds up your quote and helps a contractor give you an accurate scope without a second visit.
Temporary measures — a bead of exterior caulk around a leaking sill, a plastic film kit over a broken pane, or a temporary security bar on a failed lock — can buy you days or weeks while you arrange replacement. They are not solutions. If water is already inside the wall, a tarp or caulk on the exterior will not stop the damage progressing from the inside.
Which rooms and window locations give you the biggest benefit first?
Replacing the right windows in the right rooms delivers far more comfort and energy savings per dollar than replacing the same number of windows in lower-priority locations. The principle is straightforward: prioritise occupied rooms and openings that cause the largest heat loss or the most persistent discomfort.
Here is how to rank rooms and locations:
- Bedrooms: You spend six to eight hours a night in a bedroom. A cold, drafty window directly affects sleep quality and indoor comfort. Bedrooms on north-facing or wind-exposed walls are the highest priority within this category.
- Main living areas: Living rooms and family rooms are occupied for long stretches daily. A large picture window or a bay window in a living room can account for a disproportionate share of the home’s total heat loss, especially if it is single-pane or has a failed sealed unit.
- North-facing windows in cold climates: In most of Canada, north-facing windows receive no direct solar gain to offset their heat loss. They lose heat around the clock in winter. Replacing a north-facing window with a well-rated double or triple-pane unit typically produces one of the fastest comfort improvements in the home.
- Large windows and picture windows: Surface area drives heat loss. A single large picture window in a living room can lose more heat than three standard bedroom windows combined. Replace large glazed areas before smaller ones of equivalent condition.
- Basement egress windows: These are both a safety priority and often a comfort one. Older basement windows are frequently single-pane, poorly sealed, and undersized for egress. Replacing them addresses safety, moisture, and energy in one step.
- Rooms exposed to prevailing winds: In Southern Ontario, prevailing winter winds typically come from the northwest. Windows on that exposure face the harshest conditions and tend to show draft and seal problems first.
A useful mental model: think about where in your home you feel cold first in winter or where you avoid sitting near a window. Those locations are telling you exactly where the heat is escaping.
How do window age, glazing, and frame condition change your replacement priority?
Chronological age alone is a poor guide. A 15-year-old double-pane window with a sound frame and intact seals may outperform a 10-year-old unit with a failed seal and a rotting sill. The combination of glazing type and frame condition determines urgency far more reliably than the year the window was installed.
Glazing type and what it means for priority:
- Single-pane glass: Offers roughly the same insulating value as a sheet of cardboard. In a Canadian winter, the interior surface of a single-pane window can be cold enough to cause condensation and radiant discomfort several metres away. These are always medium-to-high priority for replacement, even when the frame is sound.
- Double-pane with intact sealed unit: A functioning double-pane unit with a low-e coating and argon fill performs well and can wait unless the frame or hardware has failed.
- Double-pane with failed sealed unit: Condensation or fogging between the panes is the tell. The gas fill has escaped, the low-e coating’s effectiveness is compromised, and the unit’s insulating value has dropped toward single-pane levels. Replacement is warranted.
- Triple-pane: Generally the highest-performing option for cold Canadian climates. If you already have triple-pane with intact seals and a sound frame, these windows are low priority unless there is a hardware or safety issue.
Frame condition diagnostic — answer these three questions yourself:
- Can the window lock securely? If no, it is urgent.
- Is there condensation or fogging between the panes (not on the surface)? If yes, the sealed unit has failed.
- Is the frame soft, discoloured, or does it flex when pressed? If yes, rot or structural failure is likely and full-frame replacement is needed.
For older homes, weight pockets inside the wall cavity are a common issue. If the rough opening contains old rope-and-pulley weight pockets, a pocket insert will leave those cavities uninsulated and unsealed, creating ongoing thermal bypass. Full-frame replacement is usually the right call in those situations.
Consumer Reports testing found that frame material alone does not determine performance. Some vinyl windows outperformed pricier wood frames in wind and rain resistance. What matters most is the quality of the sealed unit, the installation, and the condition of the frame you are working with.
Insert replacement or full-frame: which one should you choose?
The choice between a pocket (insert) replacement and a full-frame replacement is one of the most consequential decisions in a window project. Get it wrong and you either overspend unnecessarily or create moisture and air-sealing problems that will cost more to fix later.
Choose insert/pocket replacement when:
- The existing frame is structurally sound, square, and free of rot.
- You want lower upfront cost and less interior disruption.
- The rough opening and weather-resistive barrier behind the cladding are intact.
Choose full-frame replacement when:
- The frame is rotted, soft, or out of square.
- You are changing the window size or style.
- The existing weather barrier is compromised or you are replacing siding at the same time.
- The rough opening contains old weight pockets that need to be insulated and sealed.
| Factor | Insert / Pocket | Full-Frame |
|---|---|---|
| Upfront cost | Lower (saves roughly $200–$400 per window in labour) | Higher (adds $150–$400 in labour per window) |
| Interior disruption | Minimal — trim usually stays | More significant — exterior trim removed |
| Frame condition required | Sound, square, rot-free | Any condition |
| Air sealing quality | Limited by existing frame | Full access to rough opening |
| Long-term performance | Good when frames are intact | Best when frames are compromised |
| Weather barrier integration | Not addressed | Flashing integrated shingle-fashion |
Full-frame replacement with integrated flashing and air sealing provides better long-term thermal and moisture performance than a pocket insert when the existing frame or weather barrier is compromised. The Building America Solution Center recommends removing exterior trim to integrate head, jamb, and sill flashing shingle-fashion into the weather-resistive barrier. Skipping this step on a full-frame job is one of the most common causes of post-installation water damage.
Installation checklist items to confirm in any quote:
- Flashing at head, jamb, and sill, integrated into the weather-resistive barrier
- Air sealing at the rough opening perimeter (low-expansion foam or backer rod plus sealant)
- NFRC and ENERGY STAR labels on the product (photograph them before the installer removes them)
- Written installation warranty separate from the product warranty
- Reference to recognized installation standards in the scope of work
Pro Tip: Ask your installer specifically whether they will be removing exterior cladding or trim to integrate flashing. If they say no for a full-frame job, that is a red flag. Proper flashing cannot be done without access to the rough opening from the outside.
The risks of DIY installation for exterior openings are significant. Avoiding common pitfalls in exterior penetration work consistently comes down to flashing and air sealing — the two steps most often skipped by inexperienced installers.
How does window replacement fit into a larger renovation schedule?
Sequencing matters more than most homeowners realise. Replace windows at the wrong point in a renovation and you risk damaging new units during siding work, or leaving flashing details unintegrated because the cladding was already in place.
The general rule: replace windows before new siding, but coordinate closely with your siding contractor so flashing details are integrated into the weather-resistive barrier in a single sequence.
- Windows before siding: When you are replacing both, do the windows first. This gives the window installer access to the rough opening and allows proper head flashing to be lapped over the weather-resistive barrier before the siding goes on. Doing it in reverse almost always means cutting corners on flashing.
- Windows after roofing: If you are replacing a roof at the same time, complete the roofing first. Roofing work can damage window frames and glazing, and the roof’s drip edge and ice-and-water shield details at the eaves need to be in place before window flashing is integrated at the top of any opening near the roofline.
- Windows and insulation: If you are adding exterior insulation (continuous insulation over the sheathing), the window rough opening depth changes. Plan window selection and installation after the insulation strategy is confirmed, not before.
- Windows and doors together: Replacing windows and exterior doors in the same project often reduces mobilisation costs and allows a single weather-barrier inspection. Energy efficiency improvements to doors and windows work together as part of the same thermal envelope, so coordinating them makes sense.
- Avoid replacing windows immediately before a siding project: New windows installed without coordinating flashing with the upcoming siding work will likely need to be partially re-done when the siding contractor arrives.
Pro Tip: Include explicit flashing and weather-barrier language in your contract with both the window installer and the siding contractor. Specify who is responsible for integrating the head flashing into the weather-resistive barrier. Without that clarity in writing, each trade assumes the other handled it.
What does window replacement cost, and when is the best time to do it?
Replacement costs vary by window type, size, and installation method. Phasing replacements across one or two seasons is often the right call for budget management, though whole-house projects can reduce per-unit costs through economies of scale.
Typical cost ranges (Canadian market, supply and installation):
- Pocket/insert replacement: Generally lower per-unit cost, with labour savings of roughly $200–$400 per window compared to full-frame.
- Full-frame replacement: Adds approximately $150–$400 per window in labour, plus the cost of any exterior trim, flashing materials, and weather-barrier repairs.
- Window type: Standard double-hung or casement windows are typically less expensive than large picture windows or custom configurations.
| Replacement type | Relative labour cost | Best for |
|---|---|---|
| Pocket / insert | Lower | Sound frames, budget-conscious phasing |
| Full-frame | Higher | Rotted frames, siding replacement, older homes |
| Whole-house project | Lowest per unit | Maximum savings, single mobilisation |
Timing and incentives:
- Off-peak season (late autumn through early spring): Installer availability is typically better and lead times shorter. Some installers offer off-season pricing.
- ENERGY STAR and NRCan rebates: Natural Resources Canada provides product-rating and certification information you should use to confirm a window qualifies before purchasing. Many utility rebates in Ontario require ENERGY STAR certification and the NFRC label as proof. Keep the label stickers or photograph them during installation — they are often required to claim rebates.
- Phasing vs. whole-house: Replacing all windows at once typically lowers the per-unit cost and requires only one mobilisation. Phasing allows you to spread costs and prioritise the highest-impact windows first, which is often the practical choice for larger homes.
Choosing ENERGY STAR-labelled windows matched to your climate zone and following manufacturer installation instructions is the baseline requirement to realise expected energy-performance benefits. A window installed incorrectly will not perform to its rated U-factor regardless of its label.
A simple decision framework you can use on your next walk-through
The most effective approach to prioritising window replacement is a five-step triage: safety first, then active damage, then comfort impact, then energy and age, then budget and phasing. Walk through your home with this checklist and you will have a clear replacement priority list within an hour.
Step-by-step checklist:
- Safety check: Does every window lock securely? Does every sleeping room have an openable egress window? Is any glass cracked or broken? Mark any failures as urgent.
- Active damage check: Is there water staining, soft drywall, or peeling paint below or beside any window? Is any frame visibly rotted or soft to the touch? Mark these as urgent.
- Comfort impact check: Which windows cause noticeable drafts, cold radiant discomfort, or condensation on the interior glass surface in winter? Rank these by how frequently the room is used.
- Energy and age check: Are any windows single-pane? Do any double-pane units show fogging or condensation between the panes? These are medium priority if no safety or damage issues exist.
- Budget and phasing check: Based on steps 1–4, group your windows into urgent, high-impact, and can-wait categories. Get quotes for the urgent and high-impact groups first.
Questions to ask your installer — and red flags to watch for:
- Will you integrate head, jamb, and sill flashing into the weather-resistive barrier? (Red flag: “We don’t need to remove the exterior trim.”)
- Do the windows carry NFRC and ENERGY STAR labels? (Red flag: No labels, or labels the installer removes before you can photograph them.)
- Is there a written installation warranty separate from the product warranty? (Red flag: Only a manufacturer’s warranty with no installation coverage.)
- Are you licensed and insured for this work in Ontario? (Red flag: Verbal assurance only, no documentation.)
- Will you provide a written scope of work before starting? (Red flag: Quote is verbal or vague about what is and is not included.)
A thorough window replacement preparation checklist covers the before, during, and after steps in detail. Reviewing it before your first contractor meeting will help you ask better questions and spot incomplete quotes. For a clear picture of what professional installation should always include, the installation standards guide is worth reading before you sign anything.
An installation checklist that confirms flashing, weather-barrier integration, multiple bids, installer insurance, and written warranties significantly reduces the risk of rework and post-installation problems.
How Proplas approaches window prioritisation for Toronto and Southern Ontario homeowners
Proplas begins every project with a safety and performance triage, not a sales pitch. The goal of the on-site assessment is to give you a clear, ranked list of which windows need attention now and which can wait, tied to your energy goals and your budget.
What Proplas inspects on-site:
- Frame condition at every window (rot, squareness, hardware function)
- Glazing type and sealed-unit integrity (fogging, condensation between panes)
- Egress compliance for all sleeping rooms
- Evidence of water infiltration at sills, jambs, and rough openings
- Existing flashing and weather-barrier condition where accessible
- NFRC and ENERGY STAR label status on current windows
What you receive from the assessment:
- A written quote with a clear scope of work (no verbal estimates)
- A phased or whole-house replacement plan ranked by priority
- Product specifications including ENERGY STAR certification and NFRC ratings, matched to your climate zone per NRCan guidance
- Confirmation of installation method (insert vs. full-frame) with rationale for each window
- Warranty documentation covering both product and installation
Proplas carries Energy Star certified windows suited to Ontario’s climate, installs with a lifetime warranty, and typically completes residential projects in as few as three days. There are no hidden fees and no surprise scope changes after the quote is signed. With substantial experience and a strong track record in Toronto and Southern Ontario, the process is straightforward from first contact to final inspection.
The practical judgement most homeowners miss
Most articles about window replacement treat prioritisation as a purely financial calculation. Replace the windows with the worst U-factor, recover the cost through energy savings, repeat. That framing misses something important.
In Canada’s climate, the comfort argument often outweighs the payback calculation. A north-facing bedroom window that makes a room feel cold from November through March is affecting sleep, daily wellbeing, and how much of your home you actually use. The energy bill savings from replacing it are real, but they are secondary to the fact that you are reclaiming a room. Prioritise by where you live in your home, not just by where the heat escapes.

The phasing question is similarly misunderstood. Replacing all windows at once is not always better. For a home with two urgent windows and eight that are merely aging, spending the full budget on a whole-house replacement means the urgent problems get fixed at the same time as windows that could have waited two years without consequence. A staged approach, done with proper sequencing and coordinated flashing, often produces better outcomes per dollar.
Canadian homeowners in colder climate zones (most of Ontario outside of the GTA’s urban heat island, and certainly anywhere north of it) should weight triple-pane glazing more heavily in their decisions than homeowners in milder climates. The incremental cost of triple-pane over double-pane pays back faster when heating degree days are high, and the radiant comfort improvement in a cold bedroom is immediate.
Ready to get a clear priority list for your home?
Proplas offers on-site assessments for Toronto and Southern Ontario homeowners that produce a written, ranked replacement plan with no obligation to proceed. You get a specific scope, a transparent quote, and a clear answer to which windows need attention now versus which can wait.

Proplas’s custom window solutions are Energy Star certified, sized and configured to your exact openings, and backed by a lifetime warranty on both product and installation. Installation typically takes as few as three days, and there are no hidden fees added after the quote is signed.
To get started, book an on-site assessment or request a same-week evaluation at Proplas. Have your list of problem windows ready (room, orientation, and the issue you noticed) and Proplas will handle the rest.
Sources
These resources are worth consulting before you buy or sign a contract:
- Window Replacement | Building America Solution Center
- Update or replace windows | Department of Energy (EnergySaver)
- Product energy ratings and certification | Natural Resources Canada
- Replacement windows buying guide | Consumer Reports
- Window Replacement Guide 2026: Costs, Process & Quote Checklist | CleverHomeEnergy
- Window installation checklist | Angi