

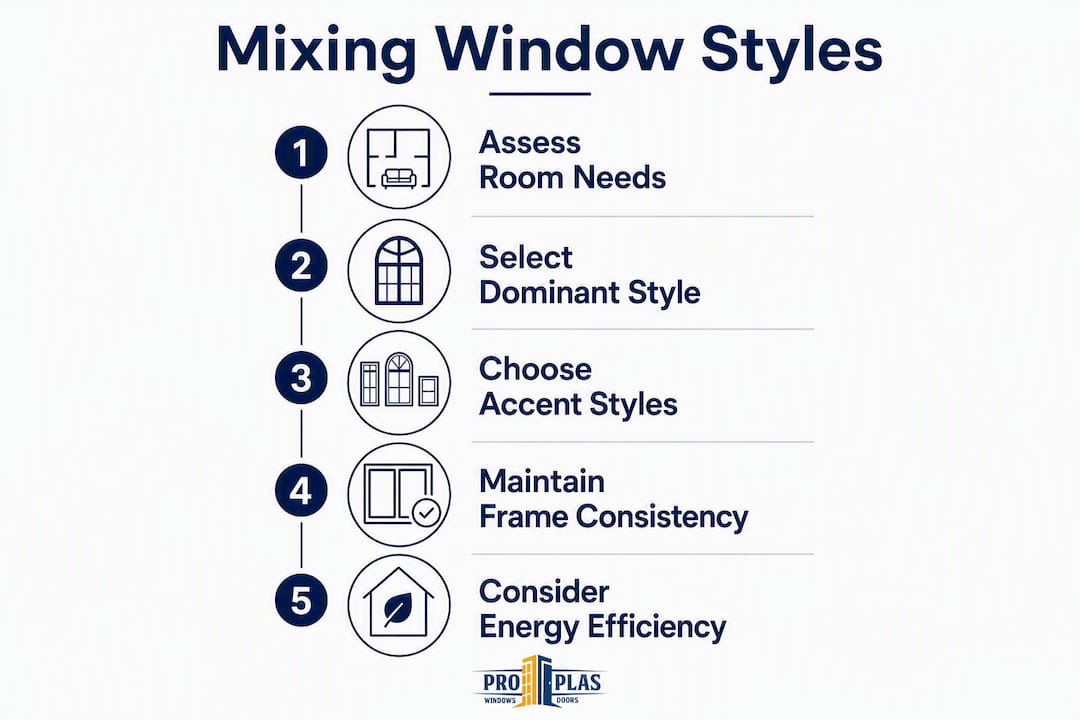
You can mix window styles throughout your home — and when done with intention, the result looks better than a single repeated style. The key is keeping three non-style elements consistent: frame material, colour/finish, and grille pattern. Let style vary; let everything else stay uniform.
Before you choose a single window, assess each room’s primary job:
- Identify the function first. Does the room need ventilation, egress, a view, or privacy? The answer determines the operating type before aesthetics enter the picture.
- Apply the dominant-style principle. Let one window style carry most of your façade. Accent styles should complement, not compete. A rough guide is to let one style appear in the majority of openings and use others selectively.
- Match frame, colour, and grille across all styles. A casement and a picture window in the same white vinyl frame with matching grilles read as a deliberate system, not a mismatch.
The sections below walk through every common style, proven pairings, room-by-room placement, Canadian energy performance requirements, and a practical planning checklist so you can approach your project with confidence.
Table of Contents
- What are the common window styles you can mix?
- Why mixing window styles benefits your home
- Rules that keep a mixed-window scheme cohesive
- Proven pairings that work well together
- Room-by-room guide: choosing styles by the window’s job
- Choosing frame materials and glazing for Canadian climates
- Practical planning checklist: measurements, timeline, and costs
- How to choose an installer for a mixed-style window project
- The golden rule of mixing and how professional installers apply it
- Key takeaways
- A practical perspective on mixing window styles
- How Proplas can help you plan a mixed-style window project
- Useful resources for Canadian homeowners
What are the common window styles you can mix?
Understanding what each style does — not just what it looks like — makes combining window designs far more purposeful.
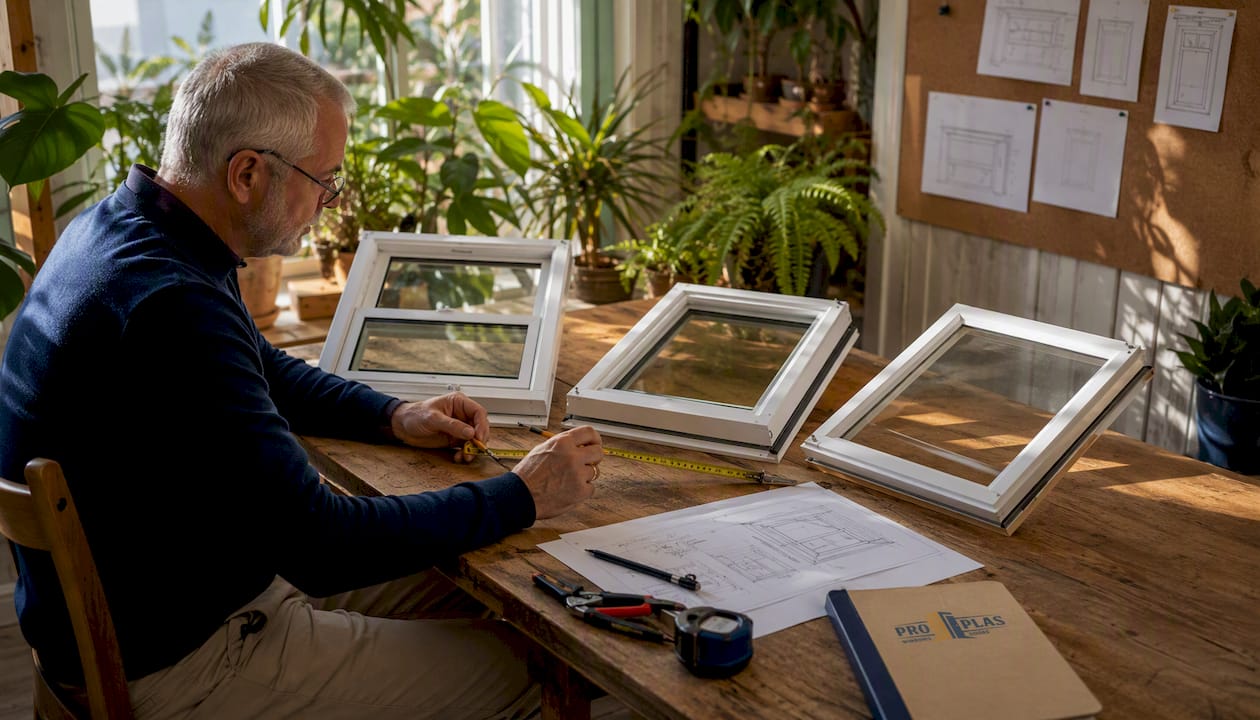
Double-hung: Two sashes that slide vertically. Both the top and bottom sash open, which allows you to draw warm air out from the top while pulling cool air in from the bottom. Best for bedrooms and traditional façades where a classic profile matters.
Single-hung: Only the bottom sash moves. Lower cost than double-hung, similar appearance. A practical choice for upper-floor rooms where exterior access for cleaning is limited.
Casement: Hinged on one side, cranked outward. Casements catch cross-breezes better than almost any other style because the open sash acts as a scoop. Best for kitchens, living rooms, and any wall where maximum ventilation is the priority. Learn more about selecting windows for airflow by room.
Awning: Hinged at the top, opens outward from the bottom. Rain runs off the open sash, so awnings can stay open during light showers. Excellent above sinks, in bathrooms, or paired below a large fixed pane.
Slider/horizontal: Sashes glide side-to-side on a track. No outward projection makes sliders ideal beside walkways, decks, or patios where an outward-opening sash would obstruct traffic.
Picture/fixed: No moving parts. Delivers the largest unobstructed view and the best thermal performance of any operable style. Always pair with at least one operable unit nearby when ventilation is needed.
Bay/bow: A projecting combination of three or more windows angled outward from the wall. Creates interior shelf space and a sense of depth. Best in living rooms and dining areas where the projection won’t interfere with exterior traffic.
Transom: A narrow horizontal window placed above a door or another window. Adds light without sacrificing wall space or privacy. Works well above entry doors, casements, or double-hung units.
Specialty/arched: Curved or geometric fixed units used as accent pieces. They draw the eye upward and emphasise architectural features. Typically placed above a standard operable window to create a focal point.
Proportion note: Tall, narrow windows emphasise vertical lines and suit traditional or craftsman homes. Wide, low windows feel contemporary. When pairing styles, align sill heights or head heights across adjacent openings so the façade reads as planned rather than assembled from leftover parts.
Why mixing window styles benefits your home
Varying window styles across rooms is not just a design preference. There are practical, measurable reasons to do it.
- Tailored function by room. A picture window in the living room maximises light and views; a casement in the kitchen delivers the ventilation a fixed pane cannot. One style cannot do both jobs equally well.
- Maximised natural light. Large fixed panes in south- or west-facing walls bring in significantly more daylight than divided operable units of the same rough opening size.
- Better ventilation where it counts. Combining a large fixed pane with an operable unit — such as a picture window flanked by casements — gives you an unobstructed view and the ability to move air through the room at the same time.
- Architectural emphasis. A specialty arched window above a standard double-hung draws attention to a gable or entry feature without requiring structural changes.
- Energy-performance opportunities. Fixed windows outperform operable ones on air infiltration. Placing fixed panes where ventilation is not needed and operable units where it is means you are not sacrificing thermal performance unnecessarily.
- Curb appeal. A thoughtfully varied façade reads as custom and considered. Identical windows repeated across every opening can flatten a home’s exterior character.
A classic example: a large picture window centred on the living room wall, flanked by two casements. You get an unbroken view from the sofa, and both casements open fully for cross-ventilation on warm evenings. The three units, ordered as a combination window from the factory, share one frame and one grille pattern, so the exterior looks like a single design decision.
Rules that keep a mixed-window scheme cohesive
Mixing styles works when it follows a structure. Without these constraints, varied window styles look accidental rather than deliberate.
-
Apply the dominant-style principle. Choose one style as your primary window and use it in the majority of your openings. Accent styles should appear in supporting roles — perhaps in a feature wall, a bathroom, or above a door. Designers often describe this as an 80/20 or 70/30 approach: one style dominates, others accent. The exact split matters less than the principle: one style should clearly lead.
-
Keep frame material, colour, and finish identical across all styles. A white vinyl casement and a white vinyl picture window read as a system. The same casement paired with a brown aluminium picture window reads as a mistake. Maintaining consistent non-style elements is the single most effective way to make varied styles feel intentional.
-
Match grille and muntin patterns. If your double-hung units have a colonial grille, your transom above the entry door should carry the same grille. Mismatched muntin patterns on the same façade are one of the most common errors — the result looks like windows sourced from different catalogues.
-
Align sill and head heights where possible. On a single storey, keeping all window sills at the same height and all head heights consistent creates a horizontal rhythm that ties different styles together visually.
-
Check function before finalising style. Egress requirements apply in bedrooms and basements under the Ontario Building Code: the minimum clear opening is specified by your local authority, and the window type you choose must meet it. Casements and double-hung units typically satisfy egress requirements more easily than sliders or fixed panes.
-
Avoid outward-opening units near walkways and patios. Casements and awnings that open outward can obstruct foot traffic and create a safety hazard beside a deck or exterior door. Sliders or fixed panels are the right choice in those locations.
-
Plan for double-frame mullions. When two separately installed units sit side by side, the frames stack and create a thick visual break. Factory-built combination or mulled units avoid this by housing multiple windows in a single structural frame — cleaner appearance, better airtightness.
Pro Tip: Before ordering, ask your installer to produce a simple elevation sketch of each façade showing all window styles, sizes, and grille patterns together. Seeing the full wall at once reveals proportion problems and mismatched elements that are easy to miss when reviewing individual window specs.
Proven pairings that work well together
These combinations appear repeatedly in well-executed projects because they solve real functional problems while looking deliberate.
- Picture + casement (flanking). The picture window anchors the view; the casements on either side open for ventilation. Best in living rooms and great rooms. Ordered as a mulled unit, the three windows share one frame and one sill line.
- Awning below or above a picture window. The fixed pane maximises light; the awning provides ventilation and stays open in light rain. Ideal for kitchens above the sink or bathrooms where privacy glass is used in the lower pane.
- Double-hung + transom or arched accent above. The double-hung handles ventilation and egress; the transom or arch above adds height and light without adding another operable unit. Common in traditional and craftsman homes.
- Slider + fixed panel. The slider opens for air; the fixed panel beside it extends the view without adding mechanical complexity. Works well in basements (where ceiling height limits taller styles) and beside patio doors where outward-opening units would obstruct the deck.
| Pairing | Best room | Visual role | Operation | Energy performance | Installation complexity |
|---|---|---|---|---|---|
| Picture + casement | Living room, great room | Primary view + accent ventilation | Fixed centre, operable sides | High (fixed pane reduces infiltration) | Moderate (mulled unit preferred) |
| Awning + picture | Kitchen, bathroom | Accent ventilation + primary light | Operable top or bottom, fixed main | High | Low to moderate |
| Double-hung + transom | Bedrooms, entry, traditional homes | Primary operation + light accent | Operable main, fixed accent | Moderate | Low |
| Slider + fixed panel | Basement, patio adjacency | Primary operation + view extension | Operable one side, fixed other | Moderate to high | Low |
| Bay/bow + casement inserts | Dining room, living room | Feature projection + ventilation | Fixed centre, operable inserts | Moderate (depends on glazing) | High (structural consideration) |
Room-by-room guide: choosing styles by the window’s job
Each room has a different set of requirements. Matching the operating style to those requirements — before thinking about aesthetics — produces the most satisfying results.
Kitchen
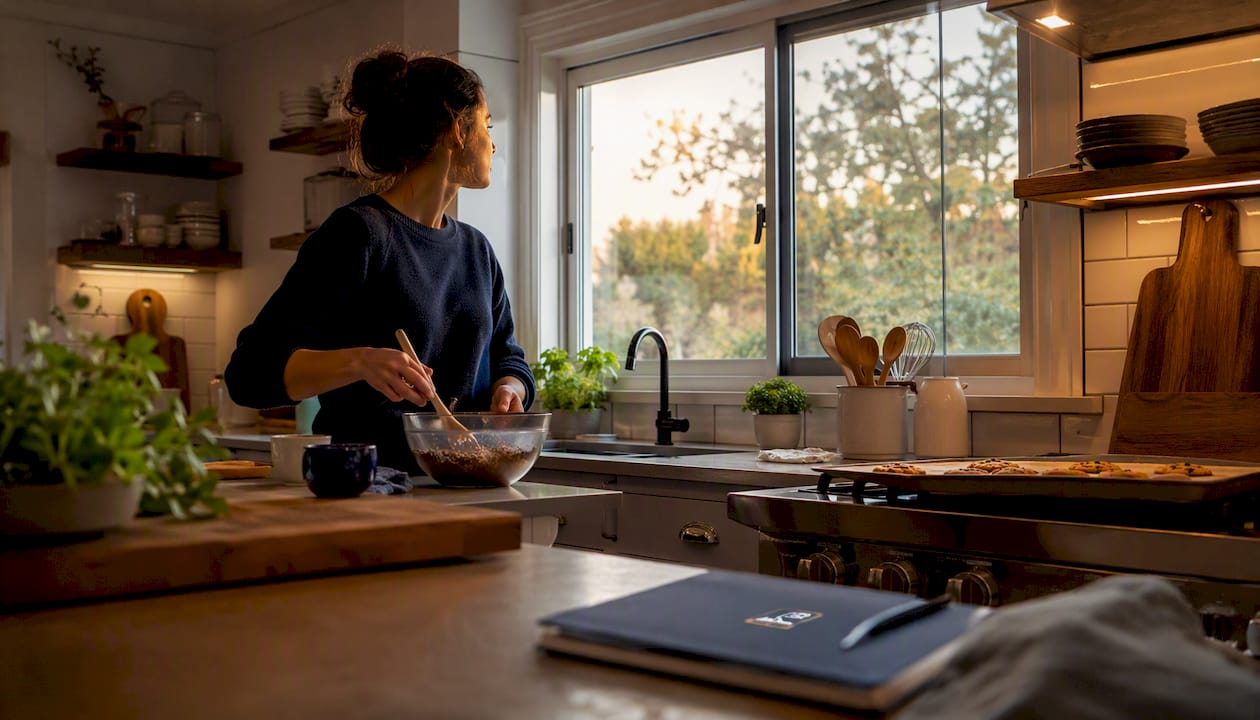
Ventilation is the priority. Cooking generates heat, steam, and odours, so at least one operable window is non-negotiable. A casement or awning above the sink works well because both open fully and the awning stays open during light rain. Pair with a fixed transom above for additional light without sacrificing wall cabinet space. Choose a frame material that resists moisture and is easy to wipe clean — vinyl performs well here.
Living room and great room
Views and daylight dominate. A large picture window or a mulled combination of picture plus flanking casements suits most living rooms. Consider furniture placement: a low sill height brings the view down to seated eye level, which works well with a sofa positioned facing the window. For rooms with high ceilings, stacking a transom above a casement bank adds height and drama without requiring a custom arched unit.
Bedrooms
Egress and privacy are the two constraints. Under the Ontario Building Code, sleeping rooms require a window that meets minimum clear-opening dimensions for emergency exit. Double-hung and casement windows both satisfy egress requirements reliably; confirm the exact dimensions with your installer before ordering. For privacy on street-facing walls, consider a higher sill height or a frosted lower pane with a clear transom above.
Bathrooms
Privacy and ventilation together. An awning or a slider with frosted glass handles both. Avoid large operable panes on street-facing bathroom walls unless privacy glazing is specified. A high transom in clear glass above a frosted fixed pane is a clean solution: light comes in from above, privacy is maintained below, and the awning or slider provides the air movement the room needs.
Basements
Egress and daylight are the twin challenges. Ontario’s building code specifies minimum clear-opening dimensions for basement sleeping rooms — a slider or casement in a window well typically meets these requirements more easily than a fixed pane. Pair with a fixed panel beside the operable unit to extend the light without adding a second mechanical unit. Window wells with reflective liners can increase the usable daylight significantly.
Patio and door-flanking windows
Operation type is the safety consideration here. Outward-opening casements and awnings beside a patio door or exterior walkway can obstruct traffic when open. Fixed panels or sliders are the practical choice. Sliding patio doors paired with fixed sidelights create a clean, unobstructed transition between interior and exterior without the swing clearance of a casement.
Choosing frame materials and glazing for Canadian climates
Canada’s climate range — from mild coastal winters to severe Prairie cold — means energy performance is not optional. The frame material and glazing you choose affect both comfort and heating costs year-round.
Frame material comparison:
- Vinyl: Low maintenance, good thermal performance, cost-effective, and available in a wide range of colours. The most common choice for residential replacement windows in Canada. Resists moisture and does not require painting.
- Fibreglass: Superior dimensional stability (it expands and contracts at nearly the same rate as glass), excellent thermal performance, and a premium finish. Higher upfront cost than vinyl, but longer service life with minimal maintenance.
- Wood: Warm aesthetic, good insulating properties, but requires regular painting or staining to prevent moisture damage. Often used on interior-facing surfaces with an aluminium or vinyl exterior cladding for durability.
- Aluminium: Strong and slim-profiled, which suits contemporary designs. Conducts heat readily, so a thermal break is required for Canadian climates. Best reserved for commercial applications or contemporary homes where the slim sightline is a design priority.
Glazing and energy metrics:
The two numbers that matter most for Canadian windows are the U-factor and the Solar Heat Gain Coefficient (SHGC). The U-factor measures how much heat escapes through the window: lower is better. The SHGC measures how much solar heat enters: in colder Canadian climates, a higher SHGC on south-facing windows can reduce heating costs, while a lower SHGC on west-facing windows reduces summer overheating. ENERGY STAR Canada provides regional ratings that match window performance to your specific climate zone — always request the manufacturer’s spec sheet and confirm the ENERGY STAR Canada rating before ordering.
When you mix window styles, keep the frame material identical across every façade. A vinyl casement beside a fibreglass picture window will show a colour and texture difference that no paint can fully correct. Ordering all units from the same manufacturer in the same material and finish is the most reliable way to maintain visual cohesion while varying styles. For large openings, factory-built combination units in a single frame outperform separately installed adjacent windows on both airtightness and appearance.
For placement guidance that ties energy performance to window position, the window placement energy efficiency tips resource covers orientation-specific recommendations for Ontario homes.
Practical planning checklist: measurements, timeline, and costs
A mixed-style window project has more moving parts than a straight replacement of like-for-like units. Planning carefully at the start prevents costly surprises mid-project.
-
Measure every rough opening accurately. Record width, height, and depth of the rough frame for each opening. Note whether the opening is structural (load-bearing header above) and whether the framing allows for the combination unit you want. Existing wall framing limits whether separate openings can be combined into a single mulled unit without altering the structure — confirm this with your installer before ordering.
-
Assess structural requirements for combination units. If you plan to join two existing openings into one large combination window, the wall framing between them may need to be removed and a new header installed. This is a structural change that typically requires a municipal building permit in Ontario. Check with your local authority before proceeding.
-
Request detailed quotes with line-item pricing. Budget drivers for a mixed-style project include: custom sizing (non-standard dimensions cost more than stock sizes), combination/mulled units (factory assembly adds cost but saves on-site labour and improves performance), glazing upgrades (low-E coatings, triple pane, argon fill), structural changes, and finishing trim. A transparent, fixed-price quote protects you from mid-project additions. Review the window replacement preparation checklist before your first installer meeting.
-
Understand the typical timeline. A standard replacement project in Southern Ontario generally follows this sequence:
- Site survey and quote: 1–3 days
- Order confirmation and custom manufacturing: 3–8 weeks depending on style complexity and manufacturer lead times
- Installation: 1–3 days for most residential projects (Proplas typically completes installation in as little as three days)
- Trim, caulking, and final inspection: 1–2 days
-
Confirm permit requirements early. Replacing windows in existing openings of the same size generally does not require a permit in most Ontario municipalities. Enlarging an opening, adding a new opening, or making structural changes to framing almost always does. Contact your local building department or ask your installer to confirm before work begins.
-
Plan window treatments at the same time. Mixed window styles often require custom or varied window coverings. A picture window may need a roller blind; the flanking casements may need individual cellular shades. Measure for treatments during the planning phase so you are not ordering custom blinds after installation.
How to choose an installer for a mixed-style window project
A mixed-style project is more complex than a straight swap. The installer you choose needs experience with combination units, custom sizing, and the design coordination that keeps varied styles looking cohesive.
Questions to ask at your first meeting:
- Can you provide spec sheets showing U-factor, SHGC, and ENERGY STAR Canada ratings for the units you are proposing?
- Do you manufacture or source factory-built combination/mulled units, or will you install separate adjacent units?
- What is the lead time for custom-sized or mulled units?
- Can you show before-and-after photos of projects where you mixed window styles?
- What does your warranty cover, and is it in writing?
Red flags to watch for:
- Vague or verbal-only timelines with no written schedule
- No written warranty or a warranty that excludes installation labour
- Unwillingness to provide a portfolio or references from comparable projects
- A quote that is significantly lower than others but does not itemise structural work, custom sizing, or glazing upgrades separately
- No mention of ENERGY STAR Canada ratings or U-factor when you ask about energy performance
What to request in writing before signing:
- A detailed scope of work listing every opening, style, size, and glazing specification
- Fixed-price line items for custom or mulled units and any structural changes
- Installation method (how the unit will be set, flashed, and sealed)
- Waste removal and site cleanup expectations
- Final inspection process and sign-off procedure
A practical way to start: email your shortlisted installers with a simple request — “Please provide spec sheets for the window units you are proposing, including U-factor, SHGC, and ENERGY STAR Canada certification, along with two references from projects where you mixed window styles.” The quality and speed of the response tells you a great deal about how the project will be managed. For a full checklist of what good window installation should include, review Proplas’s installation standards guide before your meetings.
The golden rule of mixing and how professional installers apply it
The golden rule is straightforward: let function determine placement, and let consistency determine appearance. Every other decision follows from those two principles.
Here is how a professional installer typically works through a mixed-style project:
- Site survey. Measure every opening, photograph each wall elevation, and document structural constraints (load-bearing headers, existing framing, egress requirements). This is where combination unit feasibility is confirmed.
- Design mockups. Produce elevation drawings showing all proposed window styles, sizes, and grille patterns on each façade. The homeowner reviews the full picture before any units are ordered.
- Material selection. Confirm frame material, colour, finish, and glazing specifications. All units on a given façade are specified in the same material and finish at this stage.
- Factory build and mulling. Combination units are manufactured as a single system. This avoids the thick double-frame mullions that result from installing separate units side by side, and produces better airtightness than field-assembled groupings.
- Installation and quality assurance. Units are set, flashed, sealed, and trimmed. A final inspection confirms operation, seal integrity, and alignment before the project is signed off.
Mulled units deserve particular emphasis. When two or more windows are ordered as a single factory-built combination, they share one structural frame. The result is a cleaner sightline, no double-frame visual break, and measurably better airtightness compared with separately installed adjacent units. For large openings in Canadian climates, this is not a cosmetic preference — it is a performance decision.
Proplas brings 25 years of installation experience to projects across Toronto and Southern Ontario, with ENERGY STAR certified window options, transparent pricing, and a lifetime warranty on workmanship. Over 10,000 homeowners have relied on Proplas for custom window and door installations — including projects that combine multiple styles across a single home.
Key takeaways
Mixing window styles works when function drives placement and consistent non-style elements — frame material, colour, and grille pattern — unify the scheme across every façade.
| Point | Details |
|---|---|
| Dominant-style principle | Let one window style appear in most openings; use accent styles selectively so the façade reads as intentional. |
| Match non-style elements | Keep frame material, colour/finish, and grille pattern identical across all styles on a given façade. |
| Function-first placement | Assess each room’s need (egress, ventilation, view, privacy) before selecting an operating style. |
| Energy performance in Canada | Request U-factor, SHGC, and ENERGY STAR Canada ratings for every unit; keep frame material consistent to maintain thermal continuity. |
| Proplas for Toronto and GTA | Proplas offers custom and mulled window combinations with ENERGY STAR certified options, transparent pricing, and a lifetime warranty across Southern Ontario. |
A practical perspective on mixing window styles
The advice most articles skip is this: the biggest risk in a mixed-style project is not choosing the wrong style. It is choosing the right styles and then ordering them from two different manufacturers in slightly different whites.
Colour consistency across window manufacturers is genuinely difficult. What one company calls “white” and another calls “white” can look noticeably different side by side on a sunny day, especially on a south-facing façade. The practical solution is to source all units from a single manufacturer, or at minimum, to request physical colour samples from every supplier and compare them in natural light before ordering. This is a step that even experienced homeowners routinely skip, and it is the one that causes the most regret after installation.
There is also a tendency to underestimate the architectural fit question. A mix of casements and picture windows looks purposeful on a contemporary home with clean lines and minimal trim. On a Victorian or craftsman home, the same combination can look out of place — not because the styles are wrong individually, but because the proportions and profile depth do not match the home’s existing character. The right question is not “do these two styles go together?” but “do these two styles go together on this house?” Aligning window choices with the home’s architectural period is something design professionals consistently emphasise — and it is the consideration most homeowners raise after the fact rather than before.
How Proplas can help you plan a mixed-style window project
Custom window combinations are one of the more complex residential projects a homeowner can undertake, and the details matter: frame consistency, mulled unit feasibility, glazing specifications, and installation sequencing all affect the final result. Proplas handles every one of those details for homeowners across Toronto and Southern Ontario.
With 25 years of experience and over 10,000 completed installations, Proplas supplies and installs custom windows in any combination of styles — including factory-built mulled units that eliminate double-frame mullions and improve airtightness. All products are available with ENERGY STAR certified glazing options, and every project comes with transparent, fixed-price quotes and no hidden fees. Installation typically completes in as little as three days, and every installation is backed by a lifetime warranty on workmanship.
To see finished projects and before-and-after results from mixed-style installations, visit the Proplas portfolio. When you are ready to discuss your specific openings and room requirements, request a site survey directly through proplas.ca — a Proplas specialist will assess your home, confirm combination unit feasibility, and provide a detailed written quote with full specifications.
Useful resources for Canadian homeowners
These sources provide authoritative, Canada-relevant guidance on energy ratings, permits, and glazing standards:
- ENERGY STAR Canada window ratings: Proplas’s Ontario-focused guide explains how ENERGY STAR Canada’s regional climate zones work and what U-factor and SHGC targets to request from your manufacturer.
- Interior door style coordination: Useful for homeowners who want to coordinate their mixed window scheme with interior door styles for a consistent aesthetic throughout the home.
- Proplas window replacement preparation checklist: A practical pre-installation checklist covering measurements, permit checks, and what to confirm with your installer before work begins.